TinyMonitor - A Compact Server Status Monitor
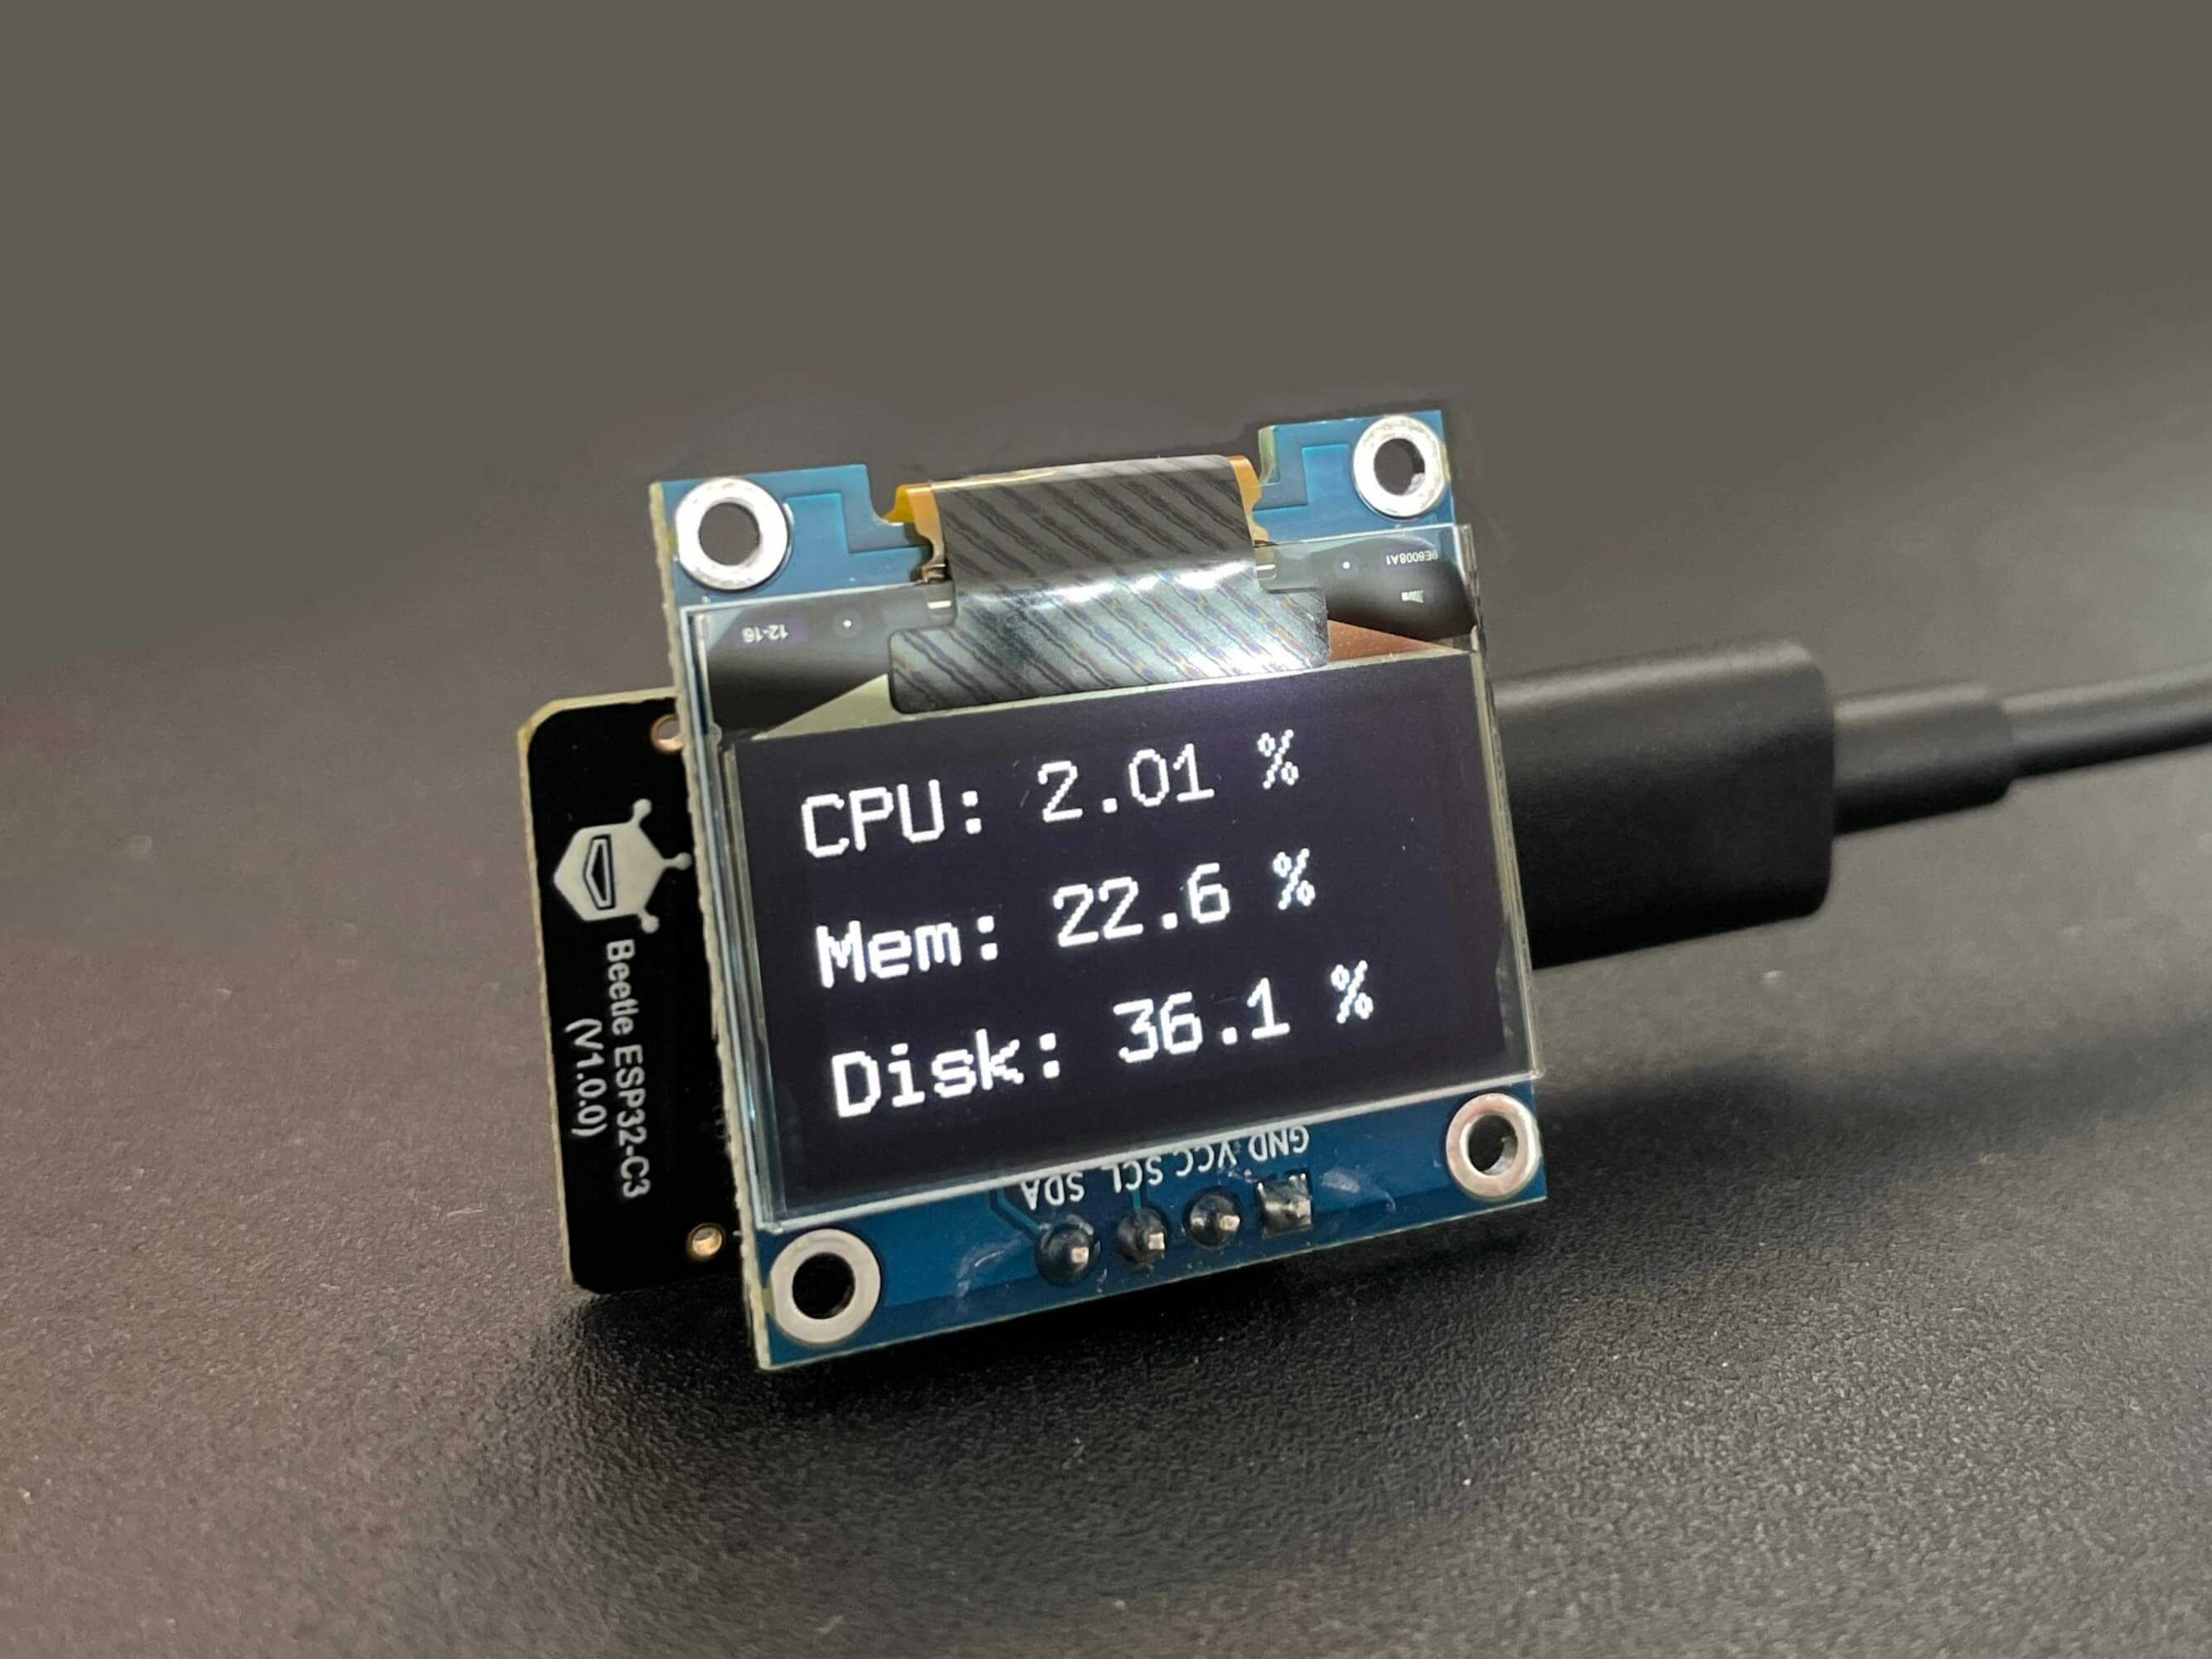
TinyMonitor is an exceedingly minimalist server status monitoring terminal. It consists solely of an ESP32 microcontroller and an OLED display screen, capable of presenting real-time server status parameters for convenient observation and debugging.
Initial Preparations
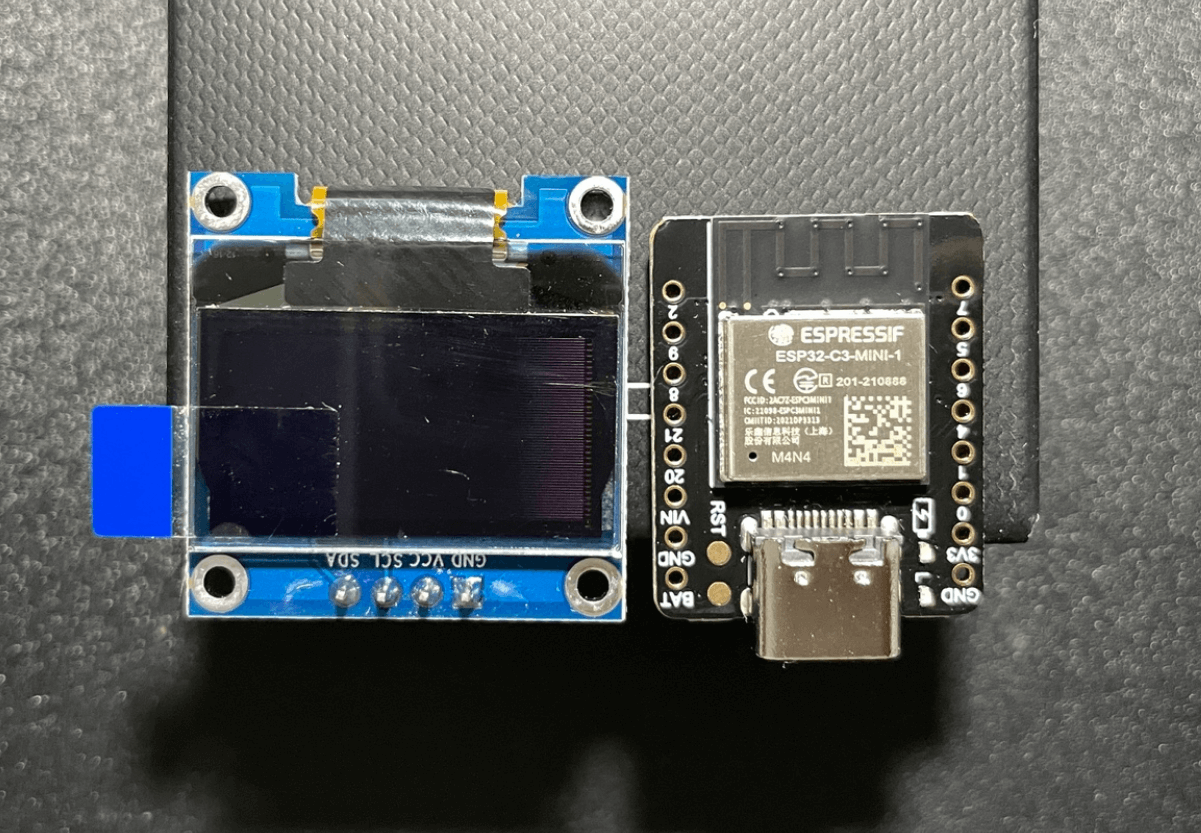
The hardware materials required for this project are quite straightforward. You'll need a Beetle ESP32-C3 with built-in Wi-Fi and Bluetooth capabilities, along with a 128x64 OLED screen.
The pin definitions for the Beetle ESP32-C3 are as follows.
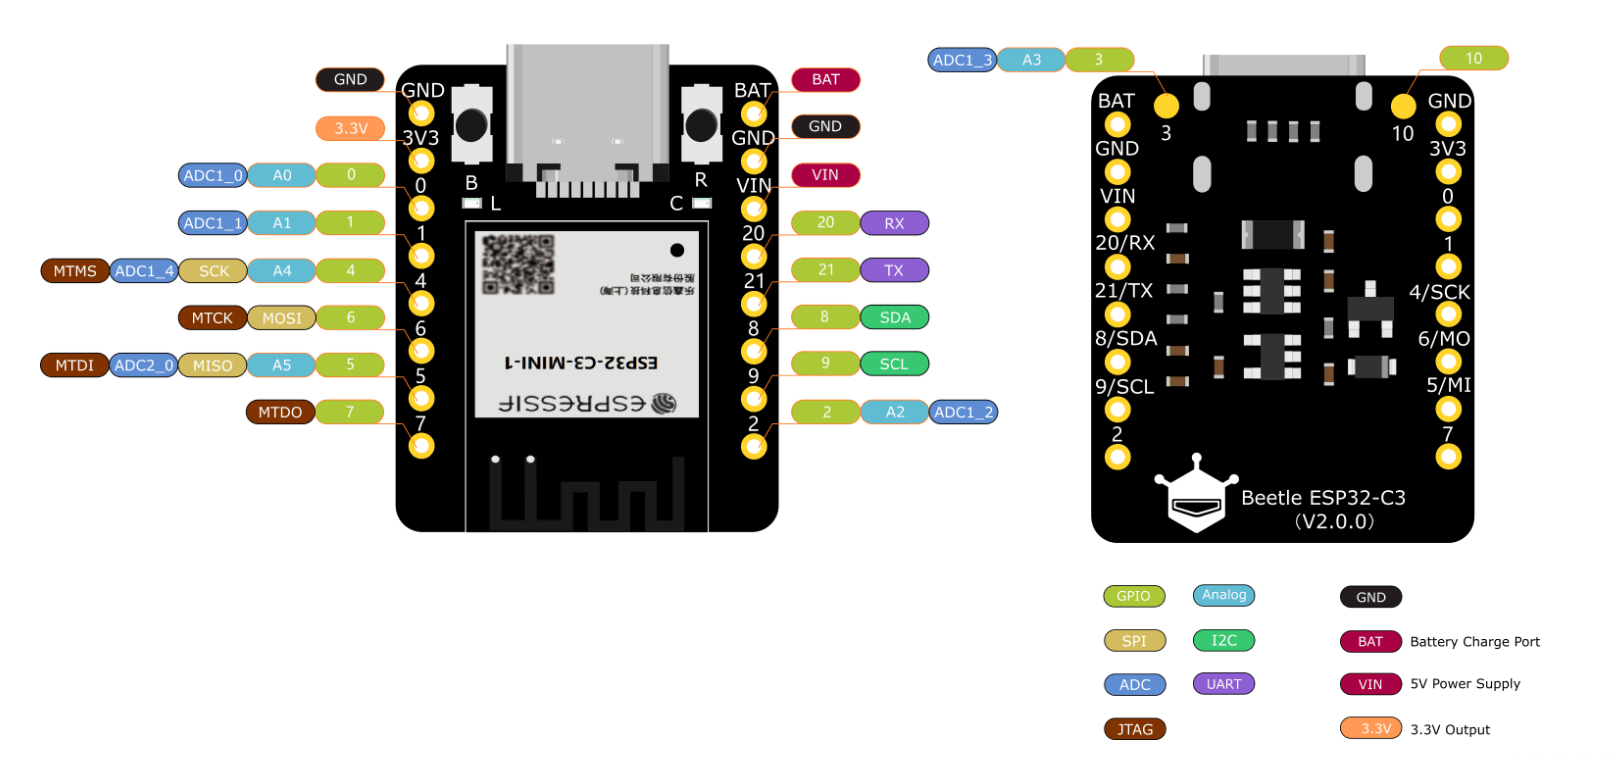
Since the OLED screen can be driven using software I2C (i.e., custom I2C pins), I have designated pins 0 and 1 of the Beetle ESP32-C3 to serve as SCL and SDA functions. This simplifies the wiring process, requiring only the soldering of the four pins adjacent to each other.
Note: Before programming the Beetle ESP32-C3, you need to add the ESP32 package to ensure the board's proper recognition. For more details, please refer to its Wiki page.
Illuminating the Screen
You can use this simple program to test whether information can be displayed correctly on the OLED screen:
#include <U8g2lib.h>

#define OLED_SDA 1
#define OLED_SCL 0

U8G2_SSD1306_128X64_NONAME_F_SW_I2C u8g2(U8G2_R2,  OLED_SCL, OLED_SDA, U8X8_PIN_NONE);

void setup(void) {
  u8g2.begin();
}

void loop(void) {
  u8g2.clearBuffer();
  u8g2.setFont(u8g2_font_ncenB08_tr);
  u8g2.drawStr(0,10,"Hello World!");
  u8g2.sendBuffer();
  delay(1000);
}
MQTT Broker Service
MQTT is a client-server based message publish/subscribe transport protocol. In this project, MQTT acts as the bridge for communication between the server and the ESP32. For convenience, I have deployed the MQTT service on the server that needs monitoring. However, you can also choose to deploy it on a different machine if necessary.
Deploying Mosquitto Service
Mosquitto is an open-source message broker software that implements the MQTT v3.1 messaging protocol. In this case, I have deployed eclipse-mosquitto using Docker as the MQTT broker server. If you are unfamiliar with Docker deployment, you can refer to the articles Docker Simplified Guide and Docker Compose - A More Elegant Approach for guidance.
According to the official instructions, you'll first need to create the following directories and files for Mosquitto to use, and assign appropriate permissions: (please replace ${STACK_DIR} with the local data storage path, for example, /DATA/AppData/mosquitto, as mentioned below)
mkdir -vp ${STACK_DIR}/{config,data,log} \
&& touch ${STACK_DIR}/config/mosquitto.conf \
&& chmod -R 755 ${STACK_DIR} \
&& chmod -R 777 ${STACK_DIR}/log \
Next, add the following content to the mosquitto.conf file:
persistence true
persistence_location /mosquitto/data
log_dest file /mosquitto/log/mosquitto.log

# Disable anonymous mode
allow_anonymous false
# Specify the password file
password_file /mosquitto/config/pwfile.conf
Deploy the container using docker-compose:
version: "3"
services:
  mosquitto:
    container_name: mosquitto_app
    image: eclipse-mosquitto:1.6.14 # 2.x versions may have compatibility issues
    ports:
      - "1883:1883"
      - "9001:9001"
    volumes:
      - ${STACK_DIR}/config/mosquitto.conf:/mosquitto/config/mosquitto.conf
      - ${STACK_DIR}/data:/mosquitto/data
      - ${STACK_DIR}/log:/mosquitto/log
    #privileged: true
    restart: always
Enter the container and change the password:
cd path-to-compose.yaml-directory
docker compose up

docker compose ps # Find the ID of the running container
docker exec -it container-ID sh # Enter the container shell

touch /mosquitto/config/pwfile.conf
chmod -R 755 /mosquitto/config/pwfile.conf

# Create a user and password, username: test, password: 123
mosquitto_passwd -b /mosquitto/config/pwfile.conf test 123

exit # Exit the container shell
docker restart container-ID # Restart the container to apply changes
Testing MQTT Server Availability
After successfully starting the mosquitto service, you can test the MQTT broker's availability using MQTTBox.
After installing the software, click on Create MQTT Client to create a connection and fill in the relevant parameters as shown in the image below:
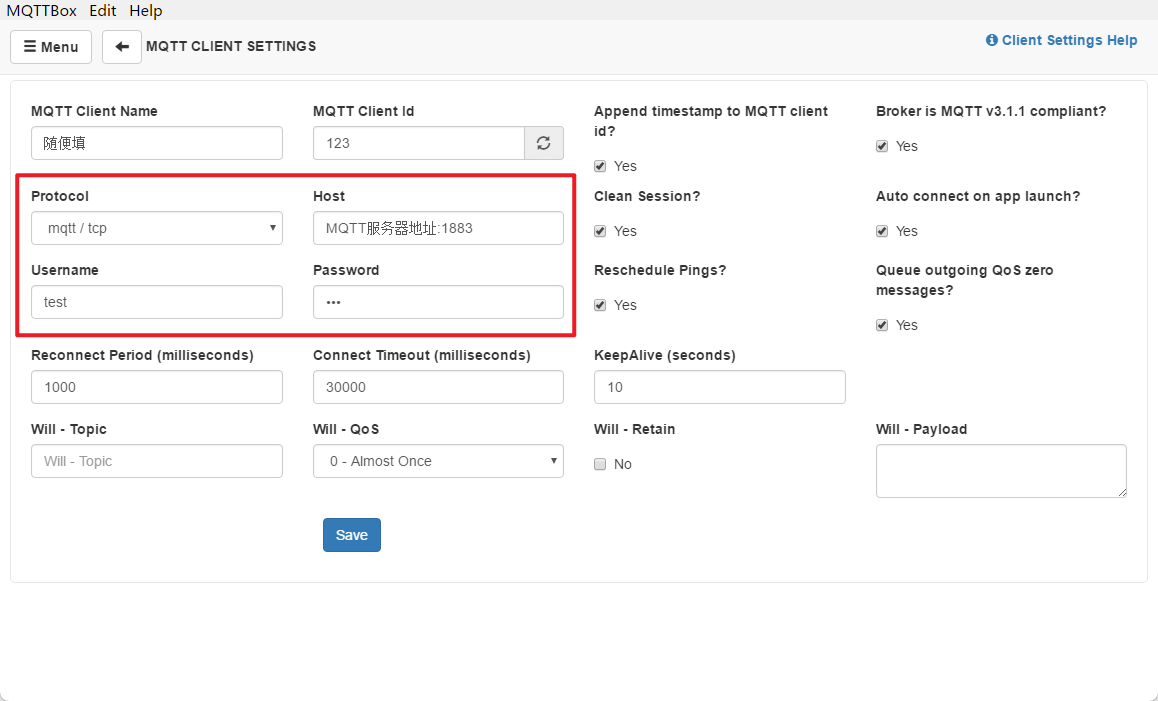
Where HOST is the address of the MQTT service on your server (e.g., my server's local network address is 192.168.1.2); the username and password should correspond to the values you set during Mosquitto configuration.
After clicking Save, if you see Connected in green in the top status bar, it means you are successfully connected to the server.
Server Monitoring Script
We can achieve real-time device information retrieval and push it to the corresponding topic on the MQTT server by running the following Python program on the server. First, you need to install the following dependencies:
Create and run the Python program:
import paho.mqtt.client as mqtt
import psutil
import time

# Connect to the MQTT broker
client = mqtt.Client()
client.username_pw_set("MQTT Username", "MQTT Password")
client.connect("MQTT Server Address", Port)
# Example: client.connect("192.168.1.2", 1883)

# Collect server status and send it to MQTT topics
while True:
    client.publish("USAGE_CPU", psutil.cpu_percent())
    client.publish("USAGE_MEM", psutil.virtual_memory().percent)
    client.publish("USAGE_DISK", psutil.disk_usage('/').percent)
    time.sleep(1) # Publish every second
Once successfully executed, you can add subscribers to these three topics in MQTTBox by clicking "Add subscriber" in the top status bar, for example:
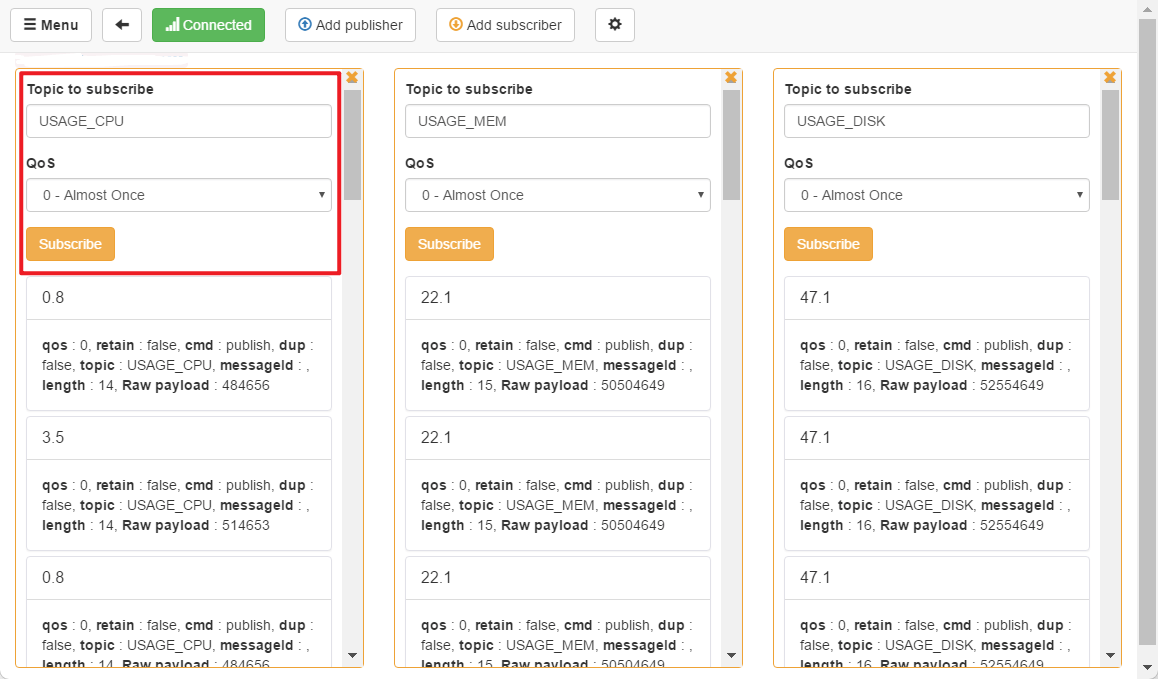
If everything is working correctly, you should see continuous updates of the server's status information in MQTTBox.
Arduino ESP32 Display
Create the following Arduino code, modify the parameters, and upload it to the ESP32. If everything is working correctly, you should see continuously updated status information.
#include <Wire.h>
#include <U8g2lib.h>
#include <WiFi.h>
#include <PubSubClient.h>

// Use software I2C to connect the OLED, redefine pins
#define OLED_SDA 1
#define OLED_SCL 0

// MQTT settings
#define WIFI_SSID "Wi-Fi Name"
#define WIFI_PASSWORD "Wi-Fi Password"
#define MQTT_BROKER "MQTT Server Address" // For example, 192.168.31.2
#define MQTT_PORT MQTT Port // For example, 1883
#define MQTT_USERNAME "MQTT Username" // Should match the configuration above
#define MQTT_PASSWORD "MQTT Password" // Should match the configuration above
#define MQTT_TOPIC_CPU "USAGE_CPU" // Subscribed topic
#define MQTT_TOPIC_MEM "USAGE_MEM"
#define MQTT_TOPIC_DISK "USAGE_DISK"

char msg_cpu_usage[10];
char msg_mem_usage[10];
char msg_disk_usage[10];

// Define the OLED screen object
U8G2_SSD1306_128X64_NONAME_F_SW_I2C u8g2(U8G2_R2, OLED_SCL, OLED_SDA, U8X8_PIN_NONE);

// WIFI client object
WiFiClient wifiClient;
PubSubClient mqttClient(wifiClient);
// MQTT Callback Function
void mqttCallback(char* topic, byte* payload, unsigned int length) {
  if (strcmp(topic, MQTT_TOPIC_CPU) == 0) {
    // Record CPU usage
    for (int i = 0; i < length; i++)
      msg_cpu_usage[i] = (char)payload[i];
  } else if (strcmp(topic, MQTT_TOPIC_MEM) == 0) {
    // Record memory usage
    for (int i = 0; i < length; i++)
      msg_mem_usage[i] = (char)payload[i];
  } else if (strcmp(topic, MQTT_TOPIC_DISK) == 0) {
    // Record disk usage
    for (int i = 0; i < length; i++)
      msg_disk_usage[i] = (char)payload[i];
  }
}

void setup() {
  u8g2.begin();  // Initialize the OLED screen
  Wire.begin();  // Start I2C communication

  // Connect to WiFi
  WiFi.begin(WIFI_SSID, WIFI_PASSWORD);
  while (WiFi.status() != WL_CONNECTED) {
    delay(1000);
  }

  // Connect to the MQTT broker
  mqttClient.setServer(MQTT_BROKER, MQTT_PORT);
  mqttClient.setCallback(mqttCallback);
  if (mqttClient.connect("ESP32", MQTT_USERNAME, MQTT_PASSWORD)) {
    mqttClient.subscribe(MQTT_TOPIC_CPU);
    mqttClient.subscribe(MQTT_TOPIC_MEM);
    mqttClient.subscribe(MQTT_TOPIC_DISK);
  }
}

void loop() {
  mqttClient.loop();  // Process MQTT messages
  u8g2.firstPage();
  do {
    u8g2.setFont(u8g2_font_9x15_tf);

    // Display CPU usage
    u8g2.setCursor(0, 12);
    u8g2.print("CPU: ");
    for (int i = 0; i < 9; i++)
      u8g2.print(msg_cpu_usage[i]);
    u8g2.print(" %");

    // Display memory usage
    u8g2.setCursor(0, 35);
    u8g2.print("Mem: ");
    for (int i = 0; i < 9; i++)
      u8g2.print(msg_mem_usage[i]);
    u8g2.print(" %");

    // Display disk usage
    u8g2.setCursor(0, 58);
    u8g2.print("Disk: ");
    for (int i = 0; i < 9; i++)
      u8g2.print(msg_disk_usage[i]);
    u8g2.print(" %");

  } while (u8g2.nextPage());
}
Exploring Further Possibilities
The following ideas are awaiting implementation:
// 更多扩展玩法 (More Extension Possibilities)

// 1. Implement additional MQTT topics for collecting and displaying more system information, such as network status or temperature.

// 2. Create a user-friendly menu system on the OLED screen to configure settings and view different system metrics.

// 3. Add error handling and notification mechanisms to alert the user in case of connectivity issues with MQTT or WiFi.

// 4. Explore different OLED screen libraries and fonts to enhance the display of system information.

// 5. Implement a remote control feature to control and monitor the device via MQTT commands.

// 6. Integrate a real-time clock (RTC) module to display the current time and date alongside system metrics.

// 7. Incorporate a data logging mechanism to store historical system data for analysis and visualization.

// 8. Develop a mobile app or web interface to remotely monitor and control the device.

// 9. Implement security measures, such as MQTT authentication and encryption, to protect sensitive data transmission.

// 10. Consider creating a more streamlined and modular code structure to facilitate future updates and enhancements.
- Enhance the battery and 3D-printed casing to create a more refined desktop ornament.
- Implement intranet penetration for it to function as a small hanging ornament, allowing you to monitor the server's status even when you're not at home.
- Package the Python monitoring program as a Docker deployment.
- Optimize the UI layout to enable monitoring of more parameters.
- Introduce multi-server status monitoring functionality.
- Add an alert feature for certain parameters exceeding threshold values.
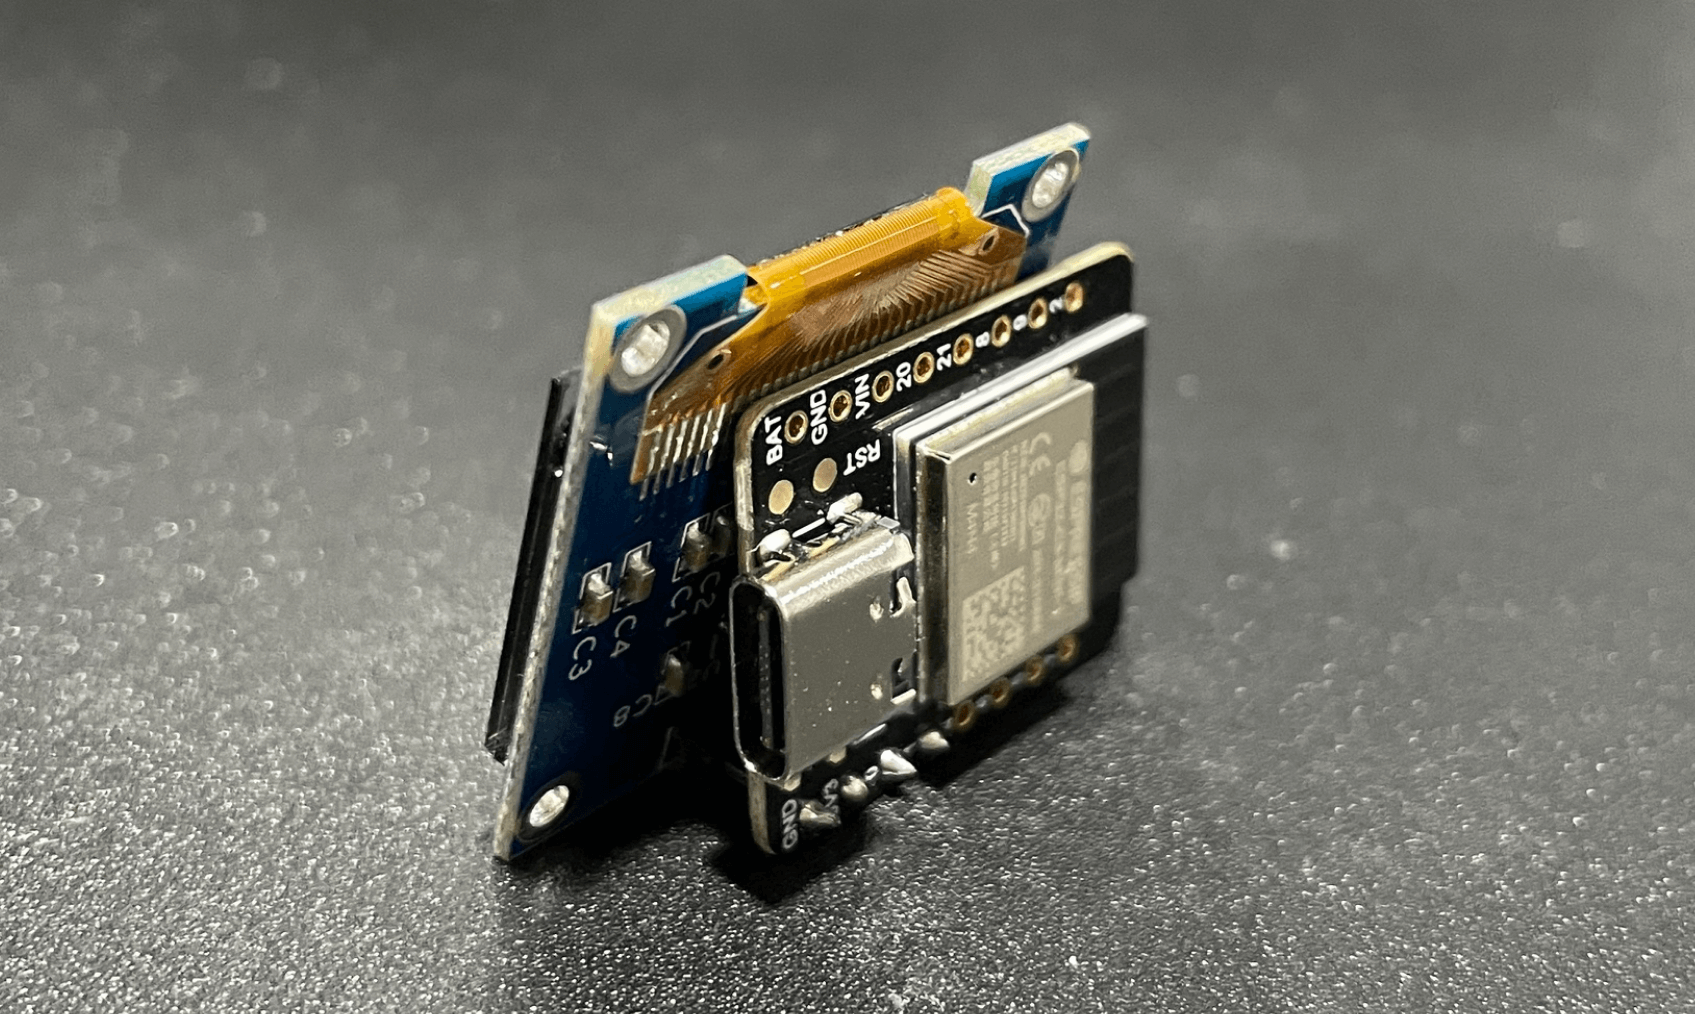
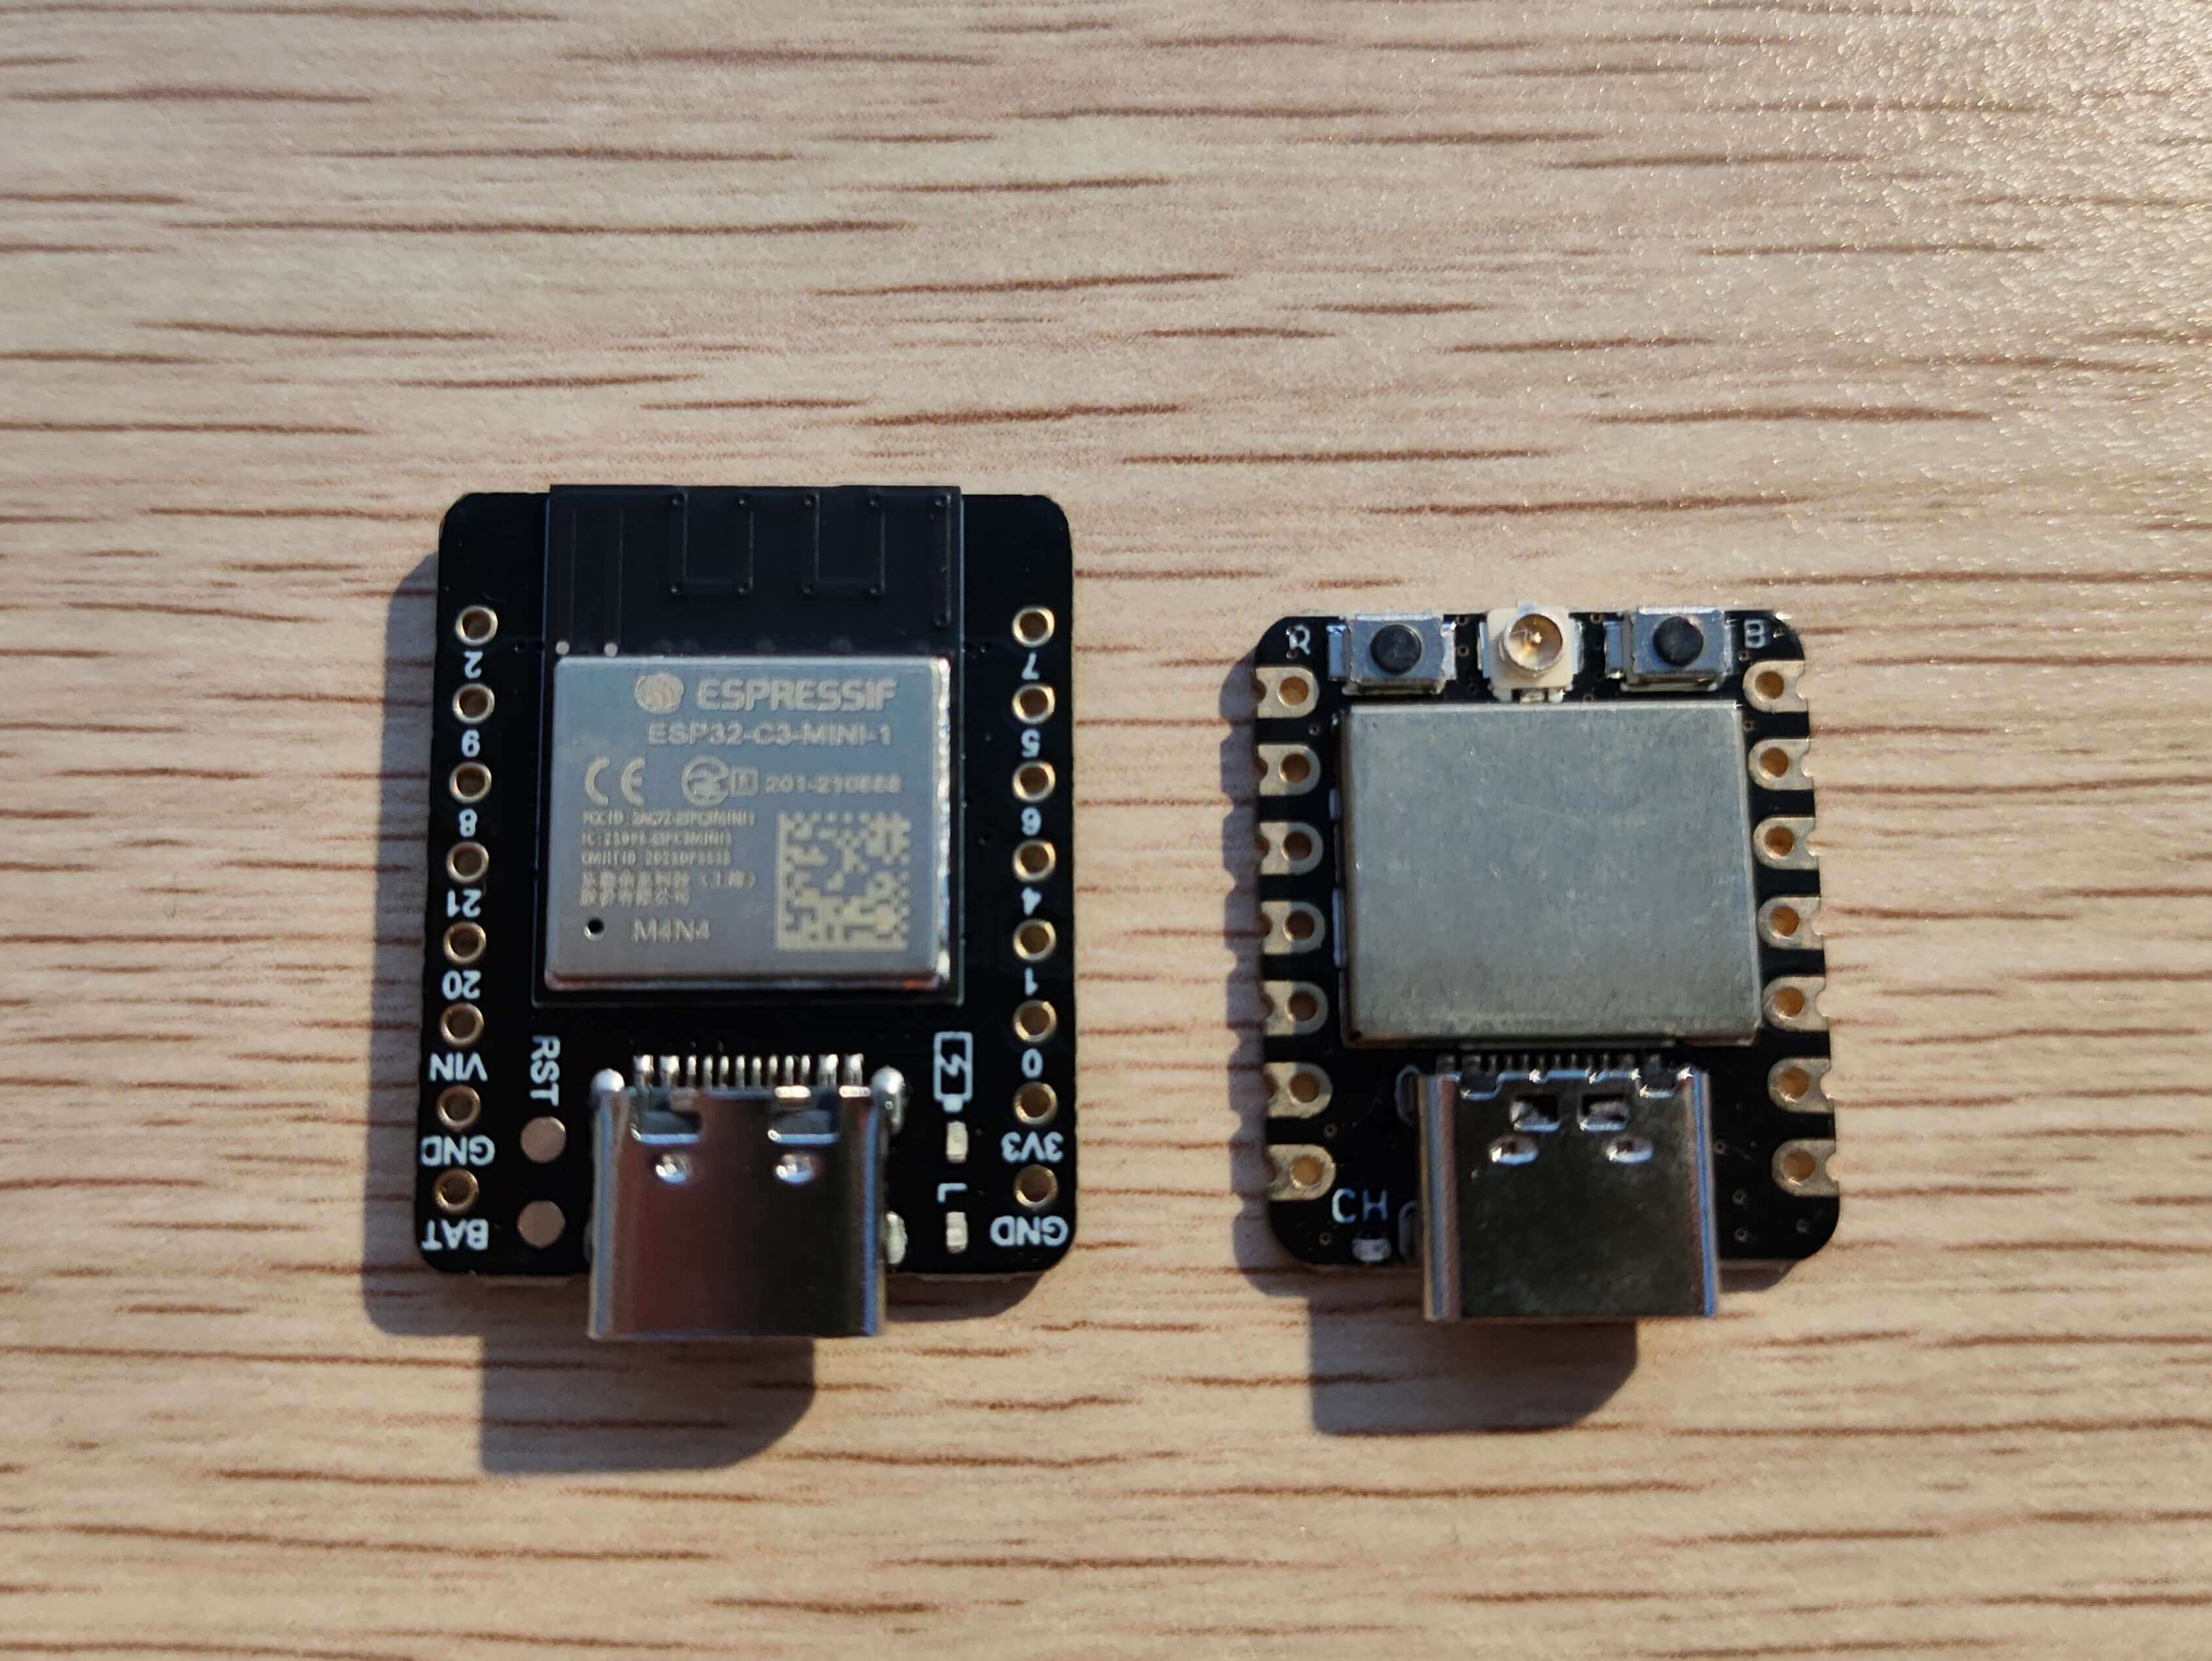
Attached: A photo featuring the Beetle ESP32-C3 and the Seeed XIAO ESP32C3.
References and Acknowledgments
- DFRobot Wiki · Beetle ESP32 C3
- Building a Raspberry Pi Performance Monitoring System with Arduino and MQTT
- eclipse-mosquitto
- Docker - Deploying the Mosquitto Service Using Containers (MQTT Server)
- MQTT Series Tutorial 3 (Installation and Use of MQTTBox, a Client Tool)
- linyuxuanlin/TinyMonitor
Original: https://wiki-power.com/
This post is protected by CC BY-NC-SA 4.0 agreement, should be reproduced with attribution.This post is translated using ChatGPT, please feedback if any omissions.