Homelab - A Free Intranet Tunneling Alternative: Cloudflared

Cloudflared is a free solution for intranet tunneling, allowing external access to hosts without public IP addresses.
Requirements:
- While Cloudflared is free, it requires linking to VISA/PayPal.
- Domain NameServer must point to Cloudflare.
- Cloudflare CDN needs to be enabled (which may result in slower domestic access speeds).
Advantages:
- No need for a public IP server.
- No need for a firewall or reverse proxy.
- Can use ports 80 and 443 without filing for ICP (Internet Content Provider) in China.
- No need to apply for SSL certificates.
- Free of charge.
Disadvantages:
- Slower domestic access speeds.
- Relatively dependent on the Cloudflare platform.
Deployment (Docker Compose)
First, create a compose.yaml file and paste the following content:
version: "3"
services:
  cloudflared:
    container_name: ${STACK_NAME}_app
    image: cloudflare/cloudflared:${APP_VERSION}
    network_mode: host
    restart: unless-stopped
    command: tunnel run
    environment:
      - TUNNEL_TOKEN=${APP_TUNNEL_TOKEN}
(Optional) It's recommended to create a .env file at the same level as compose.yaml and customize your environment variables. If you prefer not to use environment variables, you can directly customize your parameters within compose.yaml (e.g., replace ${STACK_NAME} with cloudflared).
STACK_NAME=cloudflared

# cloudflared
APP_VERSION=latest
APP_TUNNEL_TOKEN=xxx # Replace with your token
Finally, run the docker compose up -d command in the same directory as compose.yaml to start the orchestrated containers.
Configuration Details
Visit the Cloudflare Zero Trust dashboard, select Access on the left sidebar, then navigate to Tunnels and click Create a tunnel to create a tunnel. Provide a tunnel name (to distinguish between different physical machines) and save it. Note down the token and insert it into compose.yaml.
Next, access the tunnel you created and, in the Public Hostname Page tab, add the ports of the services you want to proxy. For example, if your Cloudflare-bound domain is wiki-power.com, and you want to proxy a service on your local machine at port 80 using the HTTP protocol, you just need to fill it out like this:
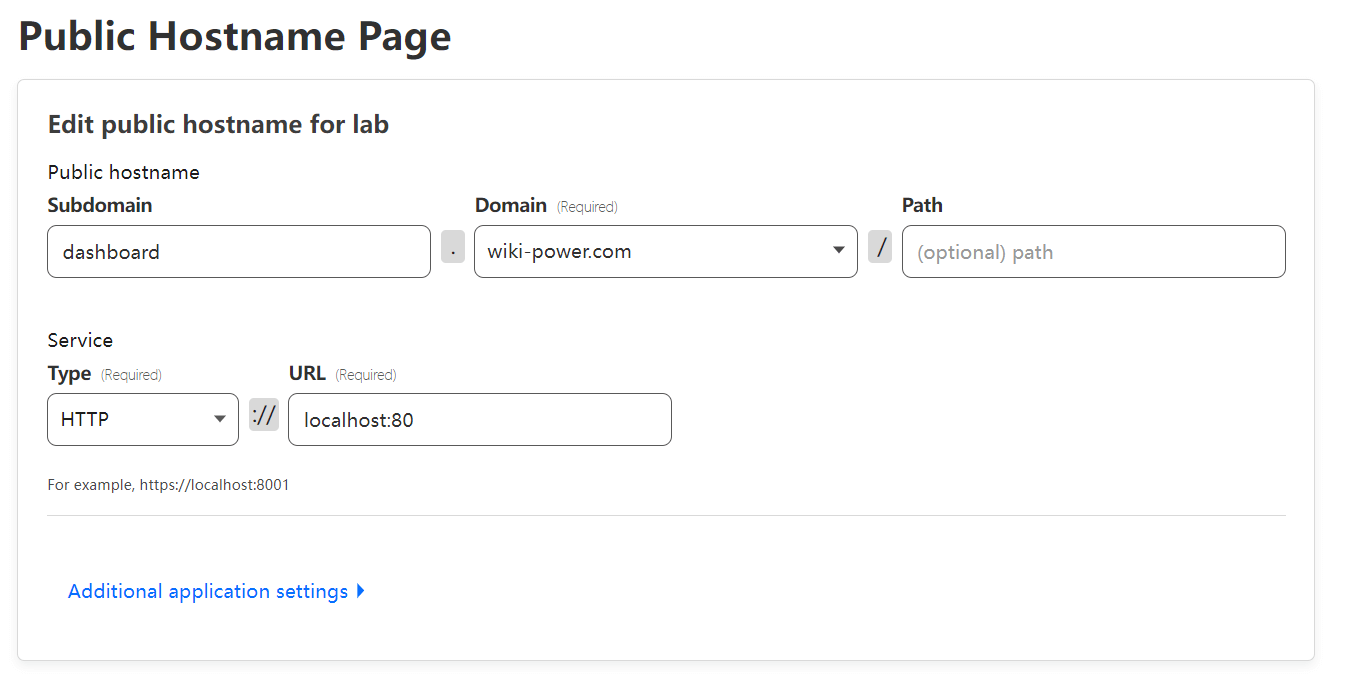
You can then access your local port via https://dashboard.wiki-power.com, and it will automatically handle SSL certificate issuance for secure public access via HTTPS.
References and Acknowledgments
Original: https://wiki-power.com/ This post is protected by CC BY-NC-SA 4.0 agreement, should be reproduced with attribution.
This post is translated using ChatGPT, please feedback if any omissions.