Building Your Own HomeLab
Homelab refers to an experimental (tinkering) environment that can be set up at home for experimentation and learning. It usually consists of a series of hardware devices (home servers, mini hosts, old computers, smartphones, Raspberry Pi, etc.) running operating systems and software (Linux, virtual machines, Docker, etc.). Homelab has many uses, such as being used as a software router, remote host, or deploying a series of self-hosted services such as personal libraries, media libraries, password managers, personal websites, RSS readers, podcast servers, and memos. It is not only practical but also a hobby that adds fun to life.
My Homelab Configuration
My own Homelab configuration consists of a lightweight cloud server + mini host + NAS, each with its own configuration and purpose:
| Lightweight Cloud Server (Alibaba Cloud 1C2G) | Mini Host (N100 CPU) | NAS (Synology DS220+) | |
|---|---|---|---|
| Public IP | Yes | No | No |
| Storage | Small | Medium | Large |
| Performance | Low | High | Low |
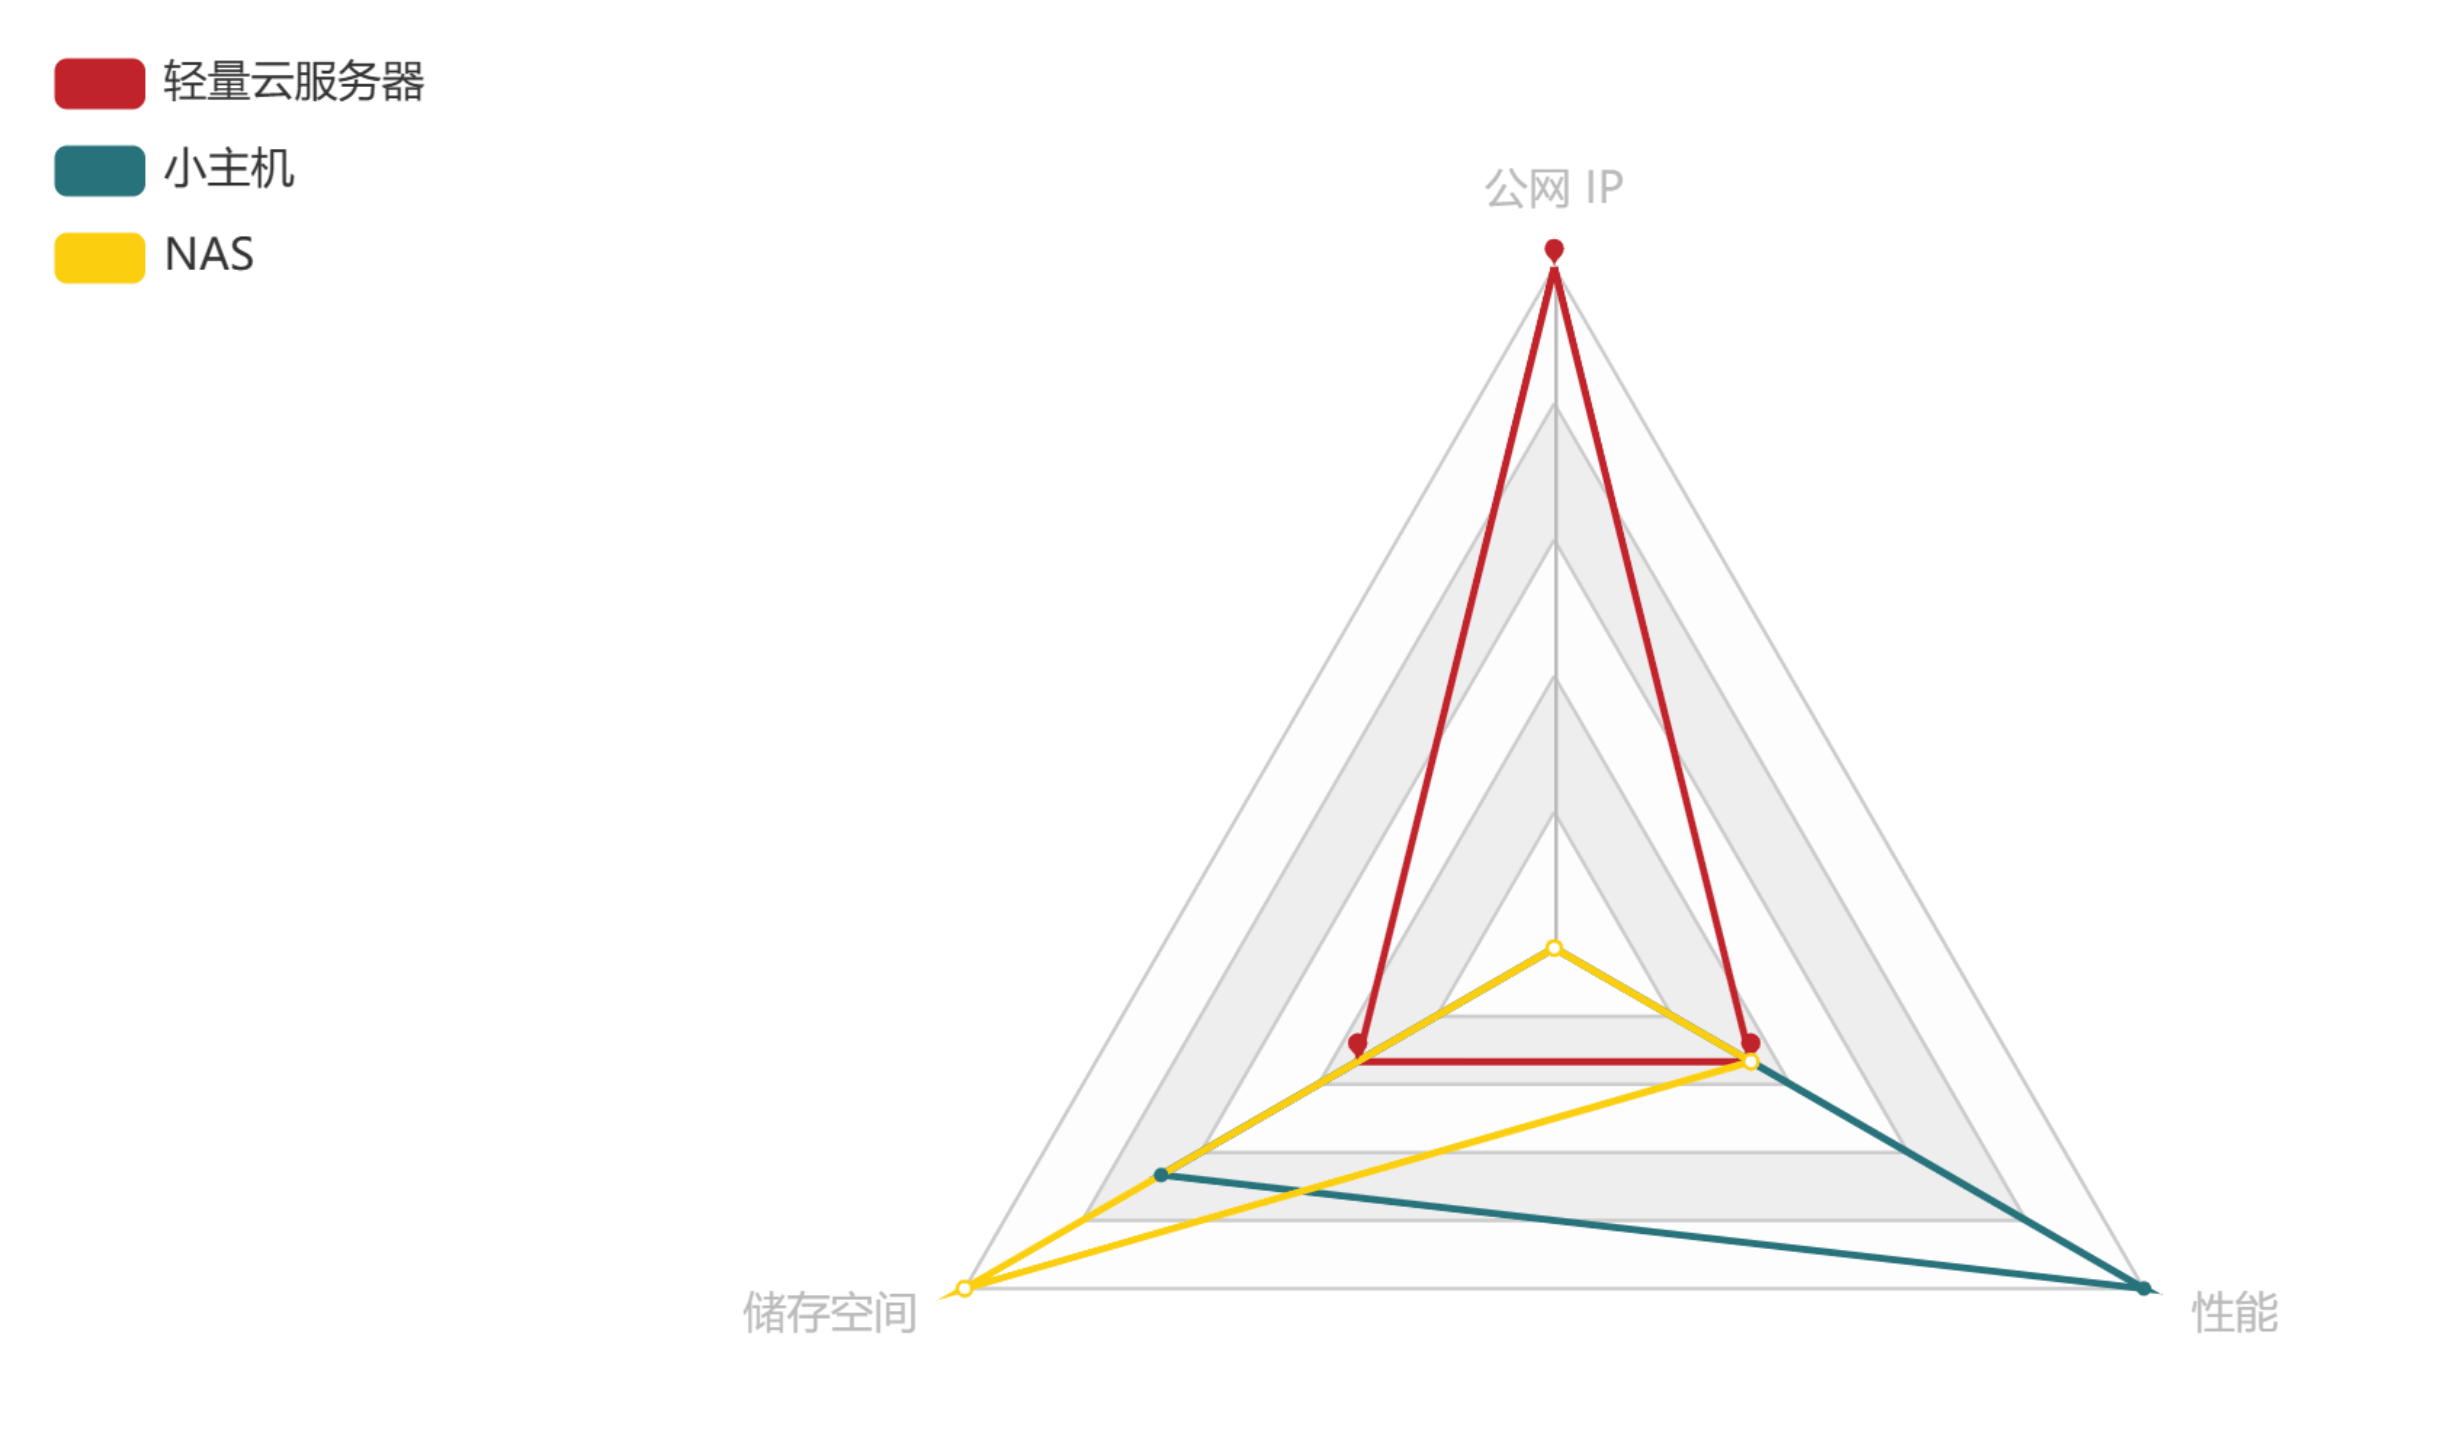
As you can see, they all have their own specialties, but when they work together, they become a triangle warrior. The lightweight cloud server is more suitable for network access, the mini host is more suitable for performance processing, and the NAS is more suitable for storage space.
Lightweight Cloud Server
The lightweight cloud server is actually the surplus of cloud server providers. It has low configuration but is affordable. For example, the Alibaba Cloud lightweight server I purchased is only ¥ 96/year (if you have a cheaper package, please let me know).
Because it has a public IP (ports 80/443 are also open), the services I deploy on this lightweight cloud server mainly include frp server, reverse proxy server, jump server for accessing other machines, panel for monitoring other hosts, small website services, website uptime monitoring, and other services that need to be accessed directly through the public network.
Mini Host
For the mini host, I chose the Zero-K N100 CPU barebone system and equipped it with 16GB DDR5 memory and a 250GB SSD hard drive. The total cost is around ¥ 1000. It has low power consumption in daily use and can provide high performance when needed.
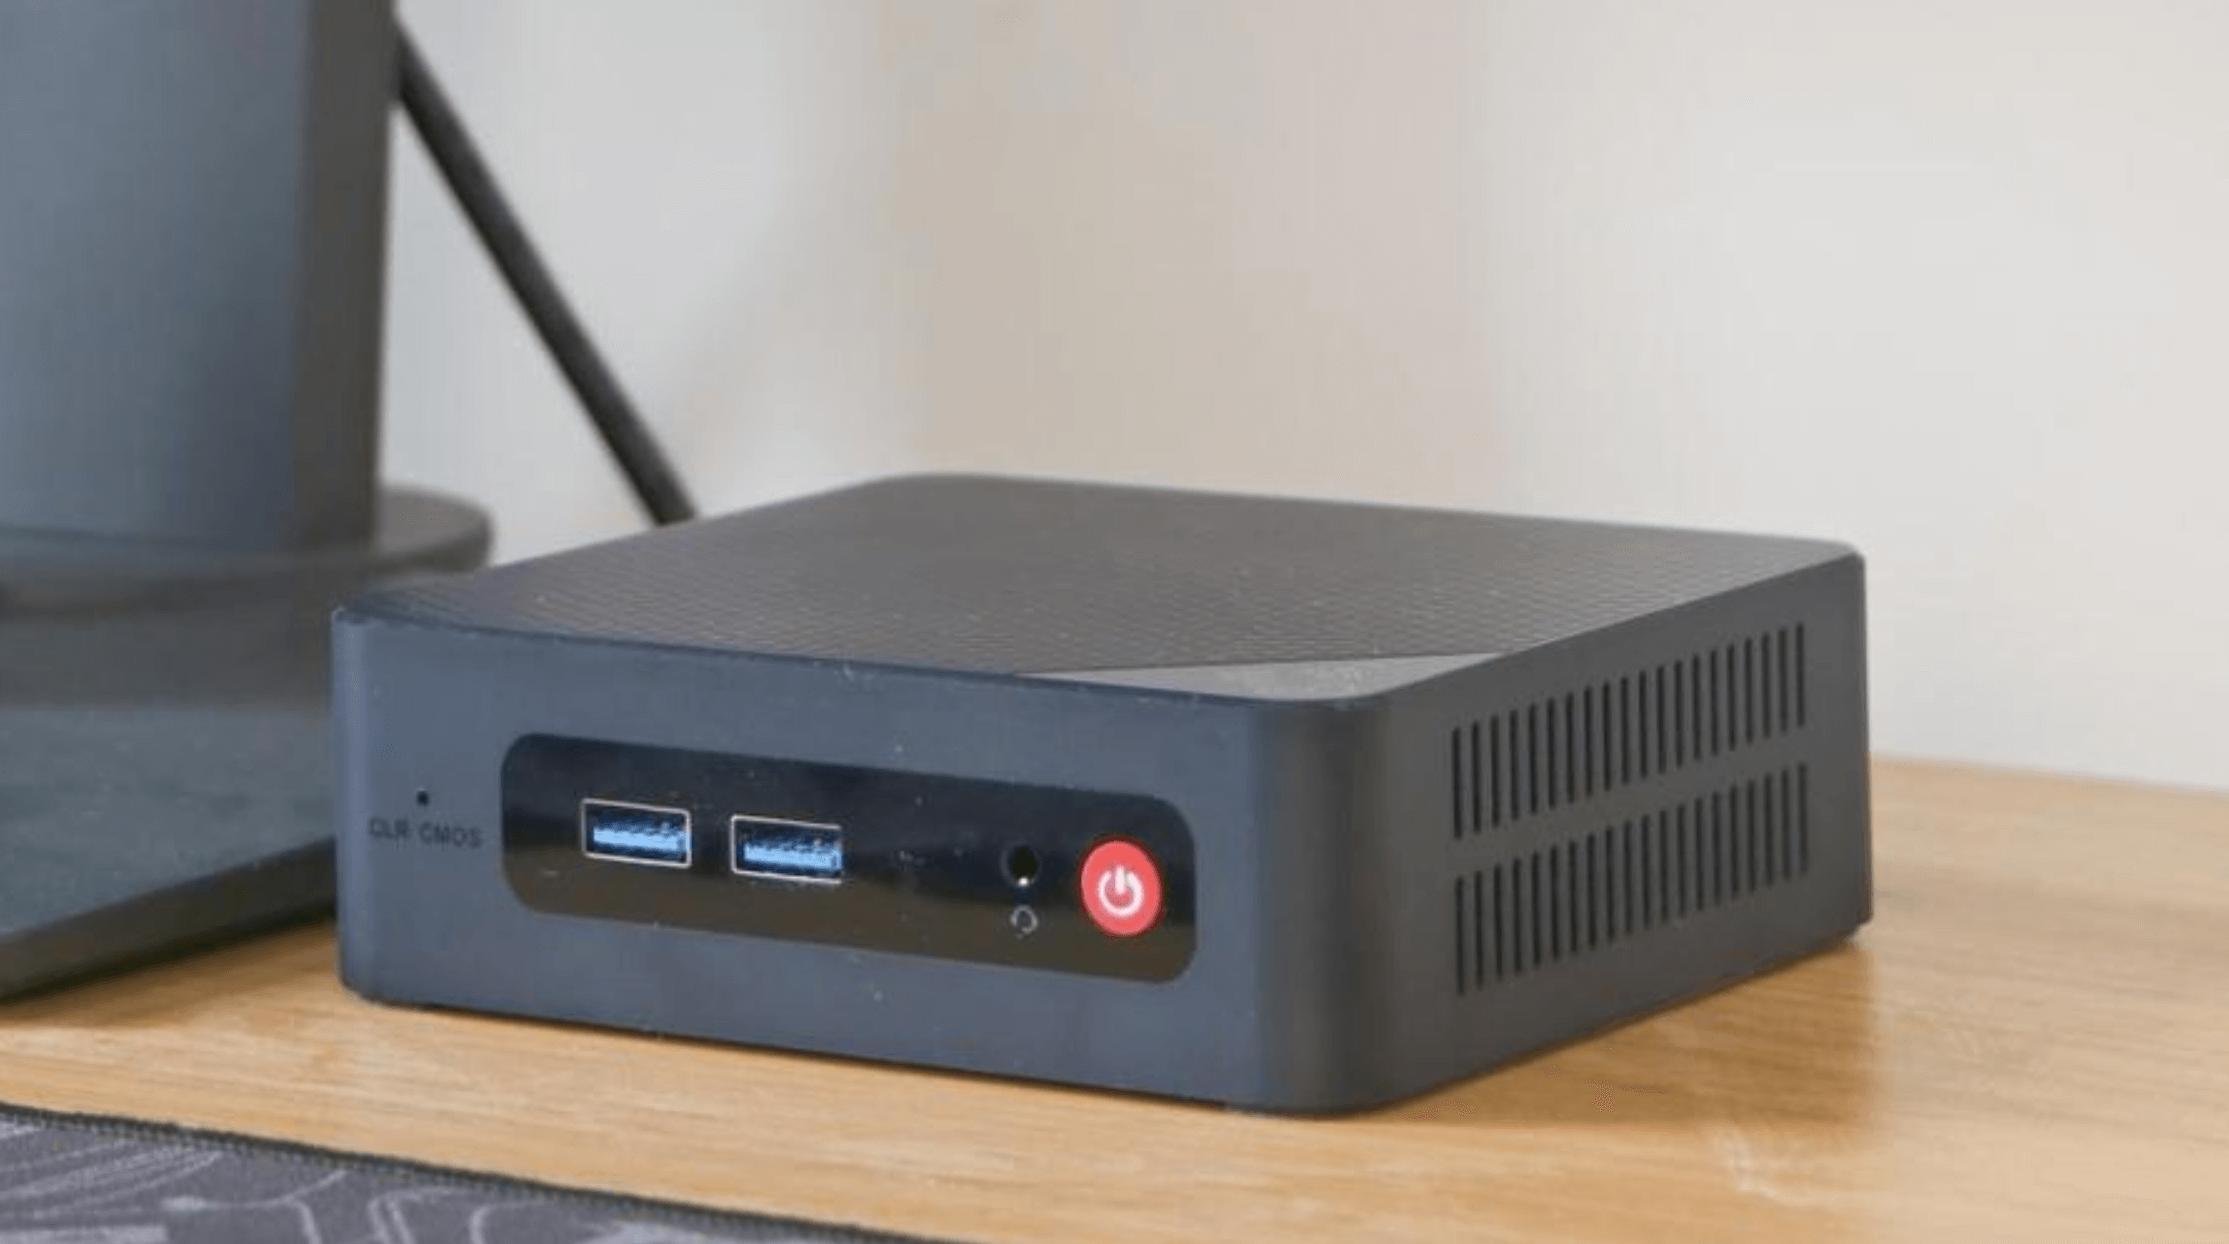
The applications deployed on the mini host mainly include web VS Code code editor, private note library, RSS reader, podcast server, media library, and intranet browser. These services require performance.
NAS
For the NAS, I chose the Synology DS220+, which has an X86 architecture that is convenient for running Docker environments. Recently, I also added a 16GB memory module to it in an attempt to improve its performance. However, I found that the bottleneck is still the weak J4025 CPU. The purchase of the Synology NAS is like buying software and getting hardware for free, but it is still worth it for the security of data.
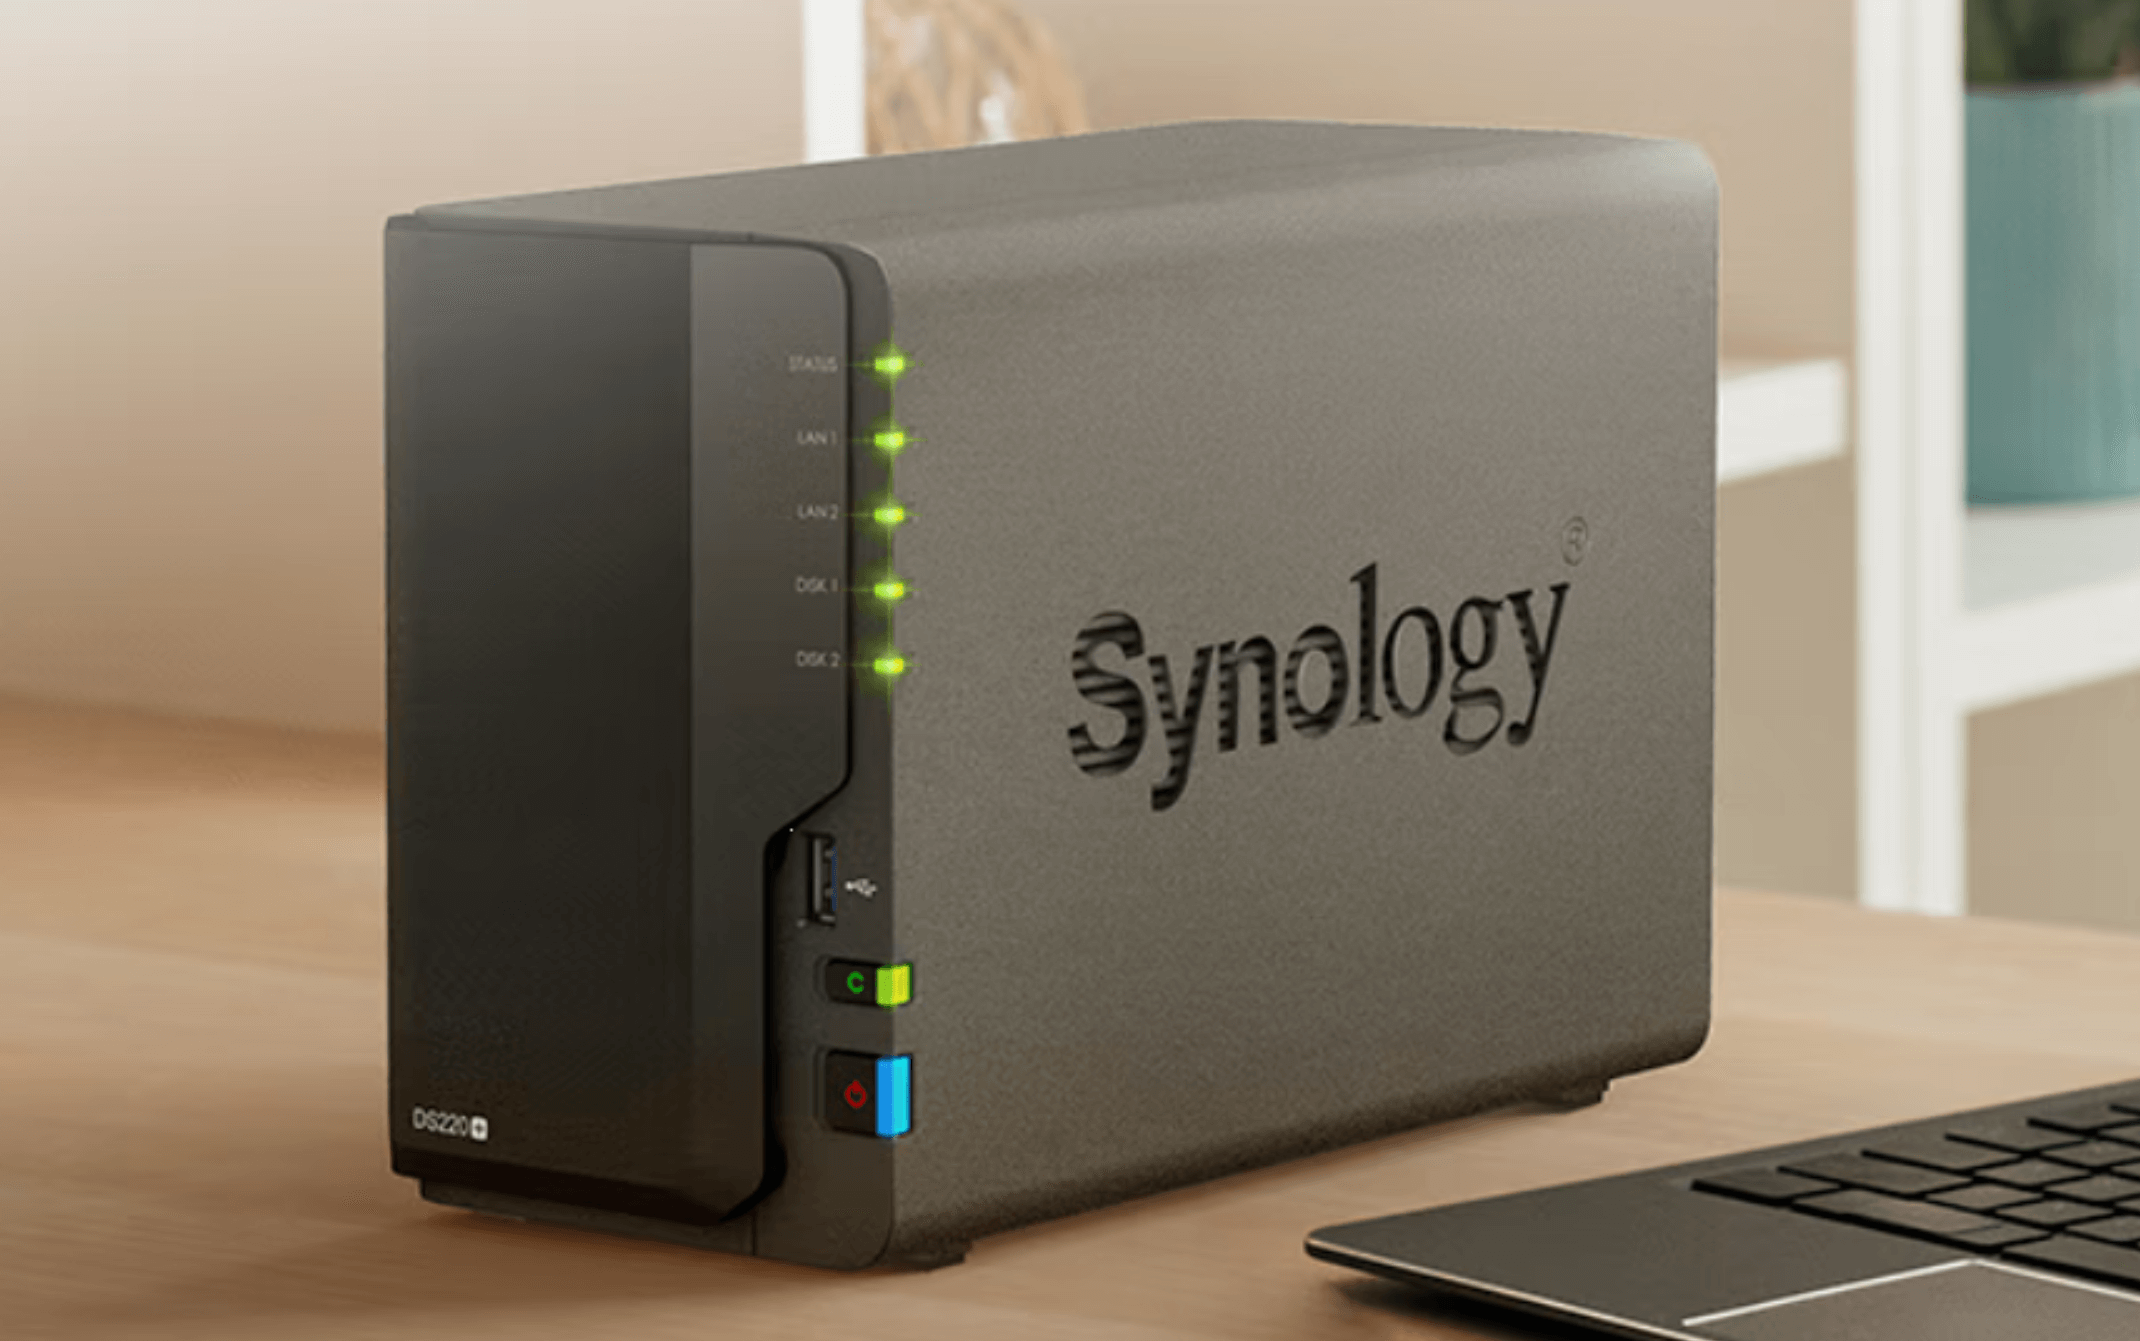
The services deployed on the NAS mainly include device data backup, cloud synchronization, photo library, and book library. These are storage-oriented services.
How to Deploy Docker Compose in One Click
With the spirit of tinkering, it is inevitable to reinstall the system frequently. It is not feasible to bring up each application one by one after deploying so many applications. Here is a simple shell script that can deploy all Docker Compose files with one click:
Traverse the first-level folders in the current directory
for folder in */; do [ "\(folder" != "Archive/" ] # Ignore the Archive folder cd "\)folder" # Enter the folder docker-compose up -d # Execute the command "docker compose up -d" cd .. # Go back to the parent directory done
echo "done."
├── compose │ ├── code-server | | ├──compose.yaml | | ├──.env │ ├── frp | | ├──compose.yaml │ ├── xxx | | ├──compose.yaml │ ├── …… │ └── compose.sh
Just execute `sh compose.sh` in the compose directory to start all Docker compose files with one click.

## Advantages of Self-Hosting

Compared to third-party hosting, where others take care of your data for you, **self-hosting** has significant advantages. You have complete control over your personal data and can customize it according to your preferences. It can help you access more high-quality sources of information (personal book library, movie library, RSS service). The prerequisite is that you have the time, energy, and financial resources, as well as a willingness to tinker.

In the following series of articles, I will introduce some basic configurations and many interesting services. The aforementioned "iron triangle" combination is just my personal differentiated configuration, but if you only have one machine, there is no problem with tinkering. Most of the content I will introduce is based on Docker and Docker-compose deployment because this method has excellent compatibility and can be used out of the box on machines with different configurations. However, it should be mentioned that it is best to choose a machine with an X86 architecture because some containers are not ARM-compatible and need to be compiled and installed manually.

## References and Acknowledgments

- [What interesting services have you deployed on your NAS?](https://www.v2ex.com/t/901954)
- [Start multiple docker-compose containers with one click](https://juejin.cn/post/7082842557482270734)

> Original: <https://wiki-power.com/>
> This post is protected by [CC BY-NC-SA 4.0](https://creativecommons.org/licenses/by/4.0/deed.en) agreement, should be reproduced with attribution.

> This post is translated using ChatGPT, please [**feedback**](https://github.com/linyuxuanlin/Wiki_MkDocs/issues/new) if any omissions.