Building an Online Book Library with Calibre (Synology Docker)
Learn how to set up an online book library using Calibre-web (Docker) on your Synology NAS.
Compared to the traditional method of using folders, book library management systems like Calibre, which are open source, offer a wide range of features, including online reading, downloading, format conversion, email delivery, and removing duplicate books. Calibre-web is a Docker image based on Calibre, making it convenient to deploy a book library on servers like Synology.
Creating the Initial Folder
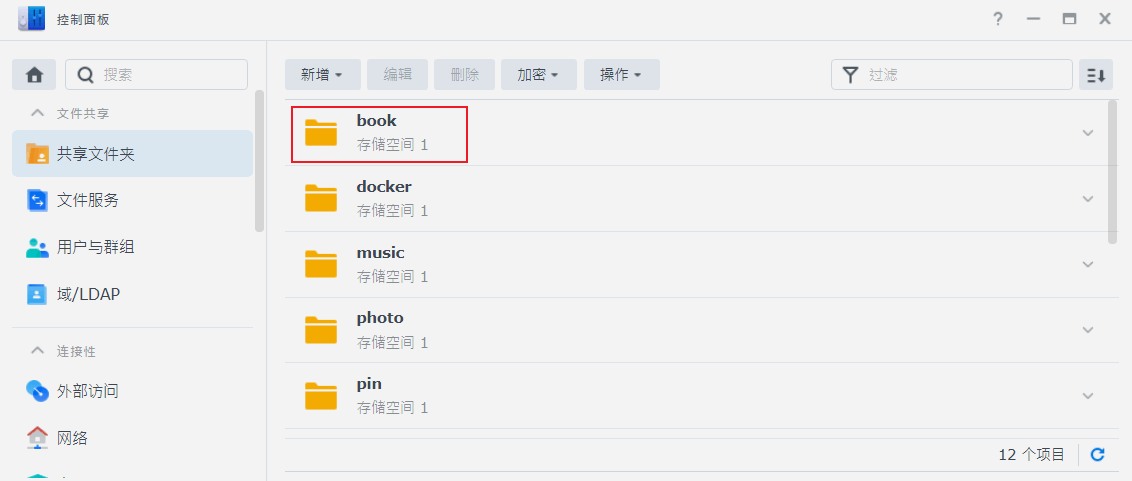
First, create a folder for your library resources. I created a shared folder named book directly in the root directory of the disk:
Correspondingly, create a folder named calibre-web within the docker folder. This folder is specifically for storing the configuration files for the Docker image.
Creating a Container
Open Synology's Docker package, search for johngong/calibre-web in the registry, and double-click to download. Initialize the container and navigate to the advanced settings.
On the "Volume" page, add mapped folders with mount paths /library and /config:
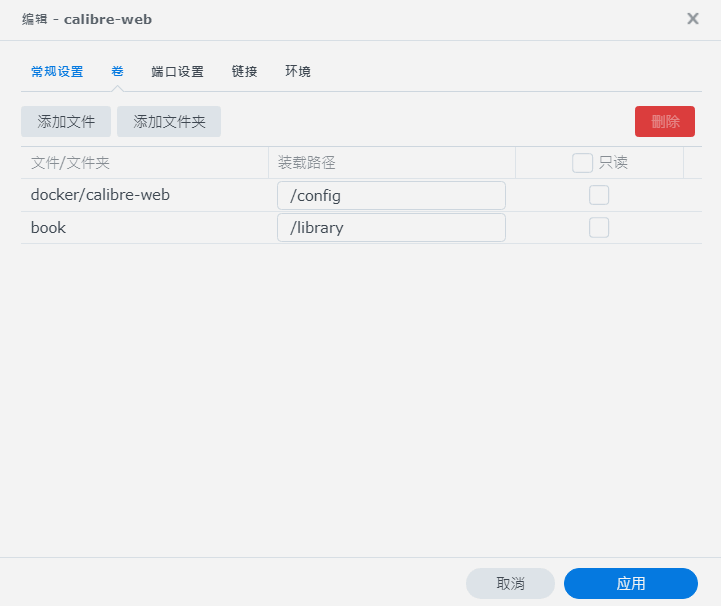
On the "Port Settings" page, add port mapping, primarily mapping the internal container's 8083 port to an external port, such as 5004.

Next, create and start the container.
Running a Test
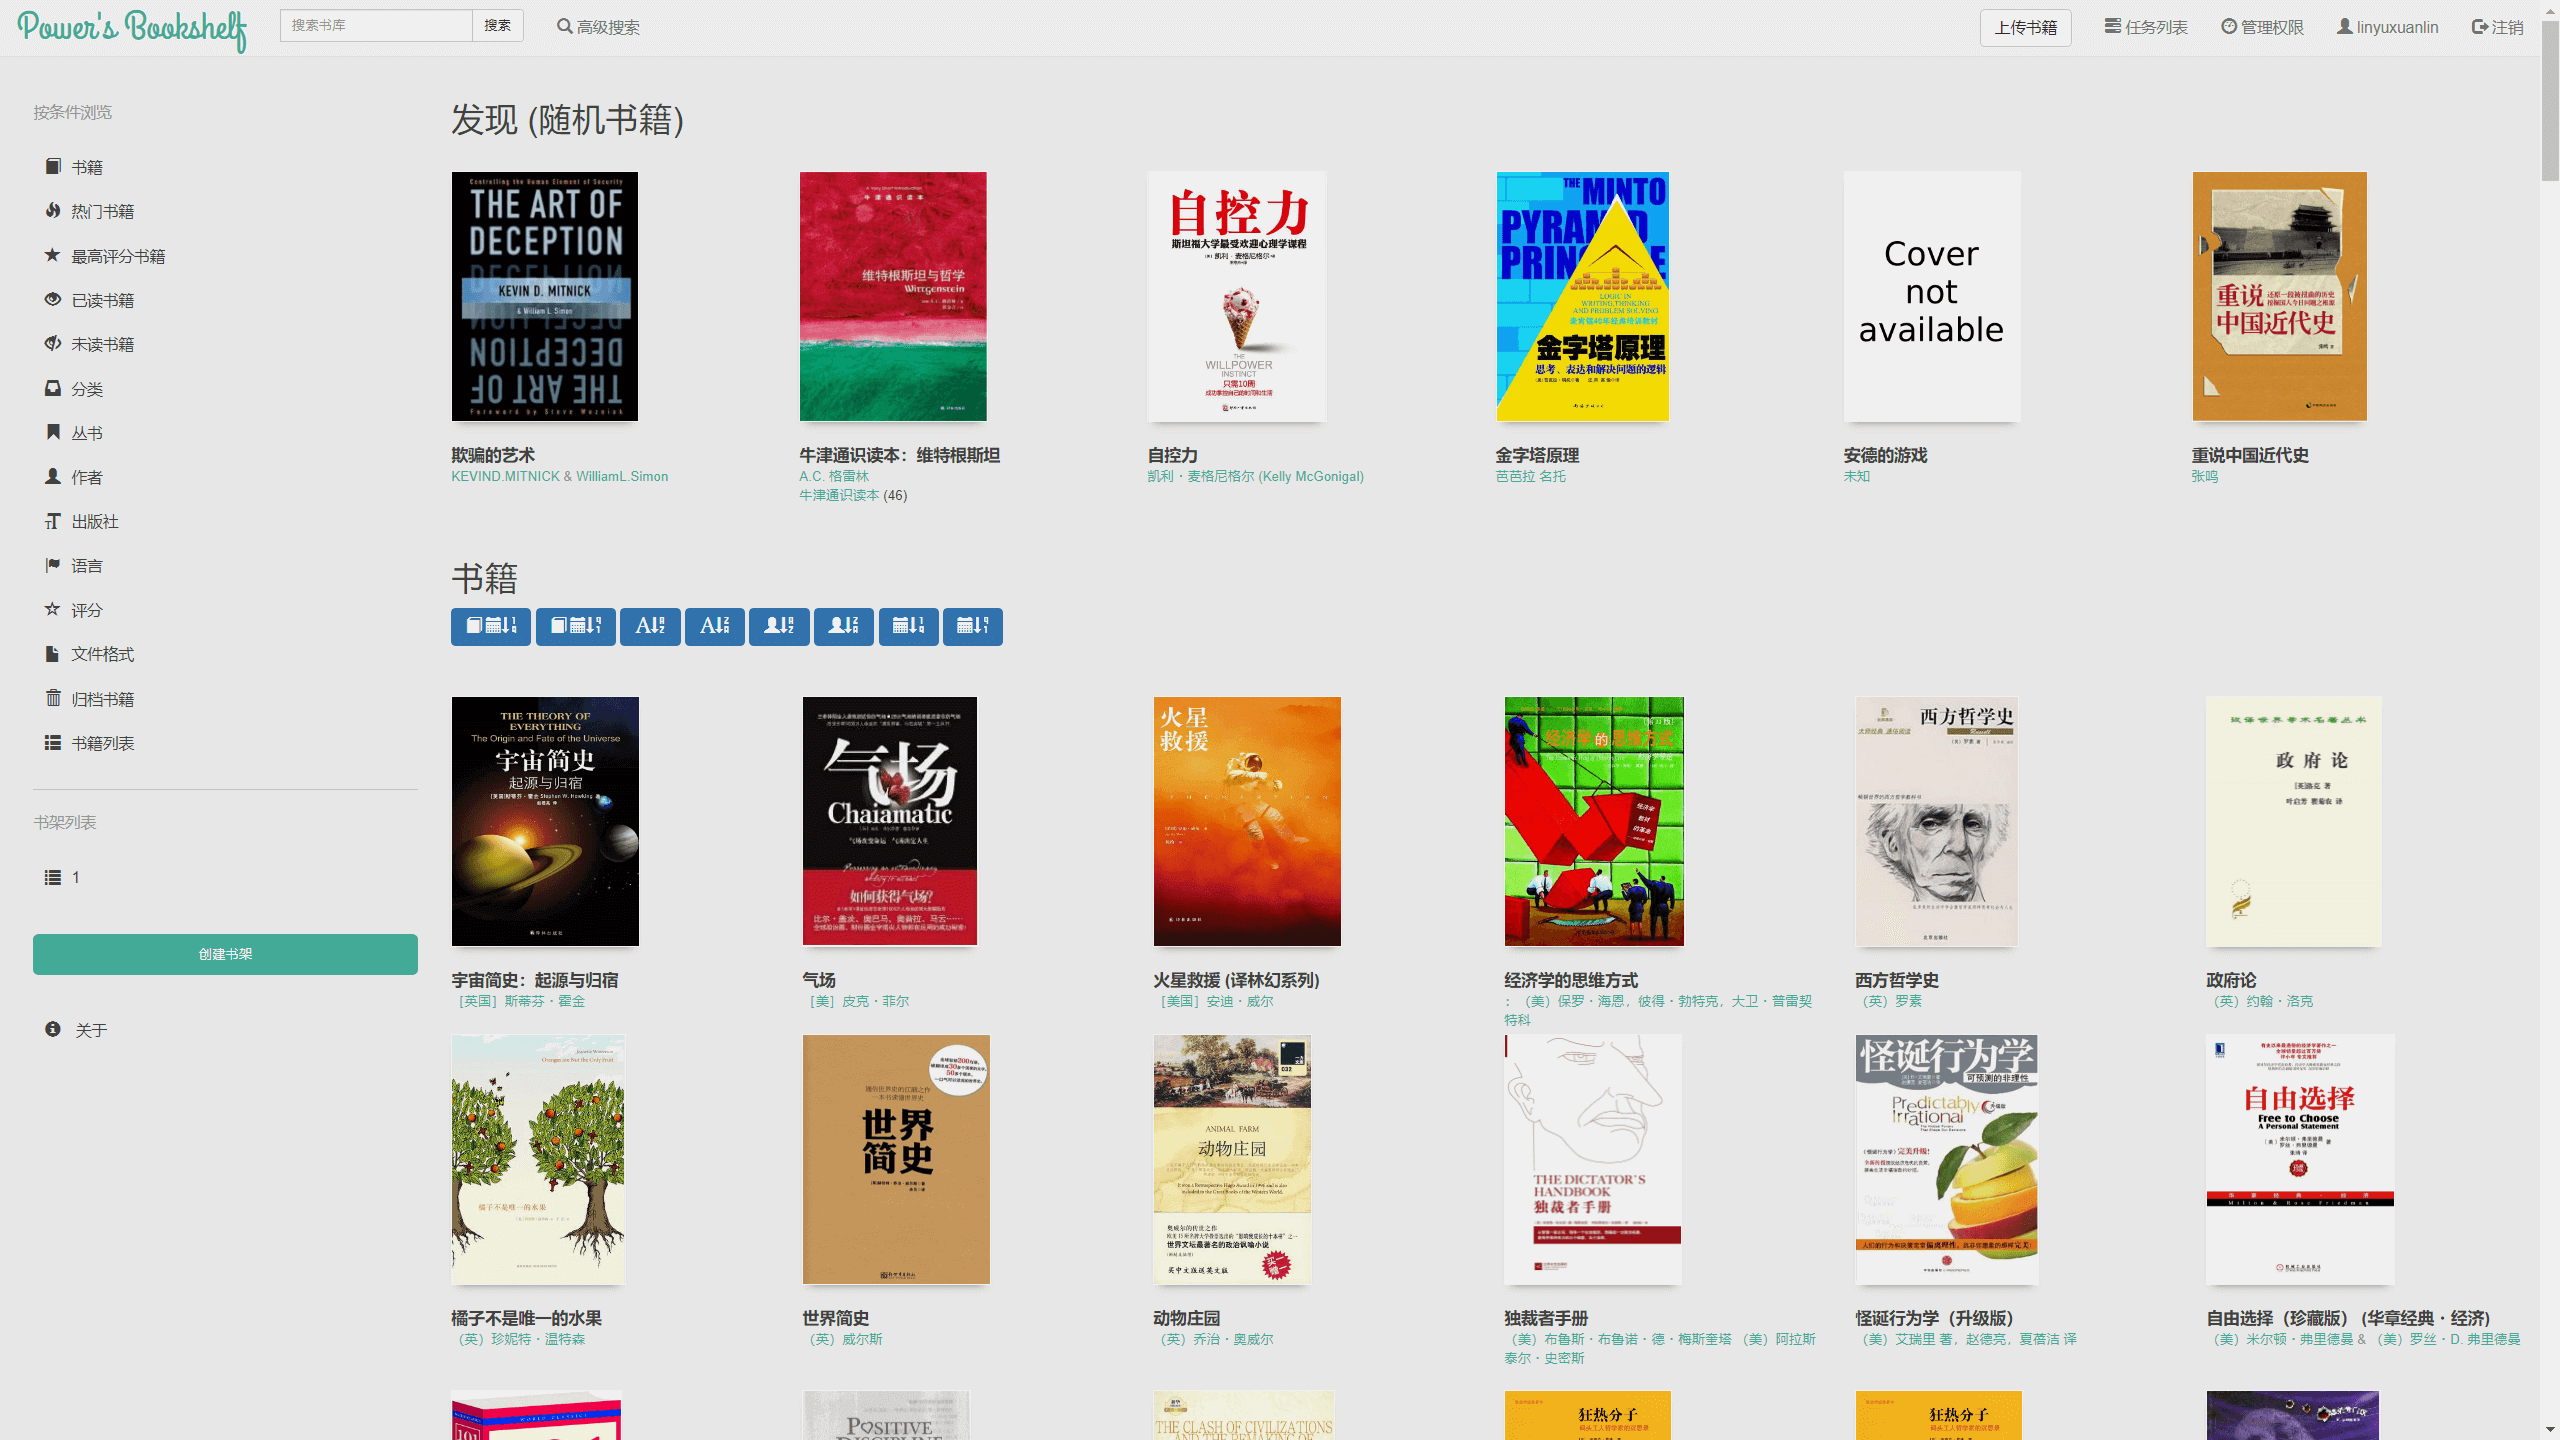
Open your Synology's local IP address followed by :5004 to access the management interface. The default credentials are admin for both the username and password.
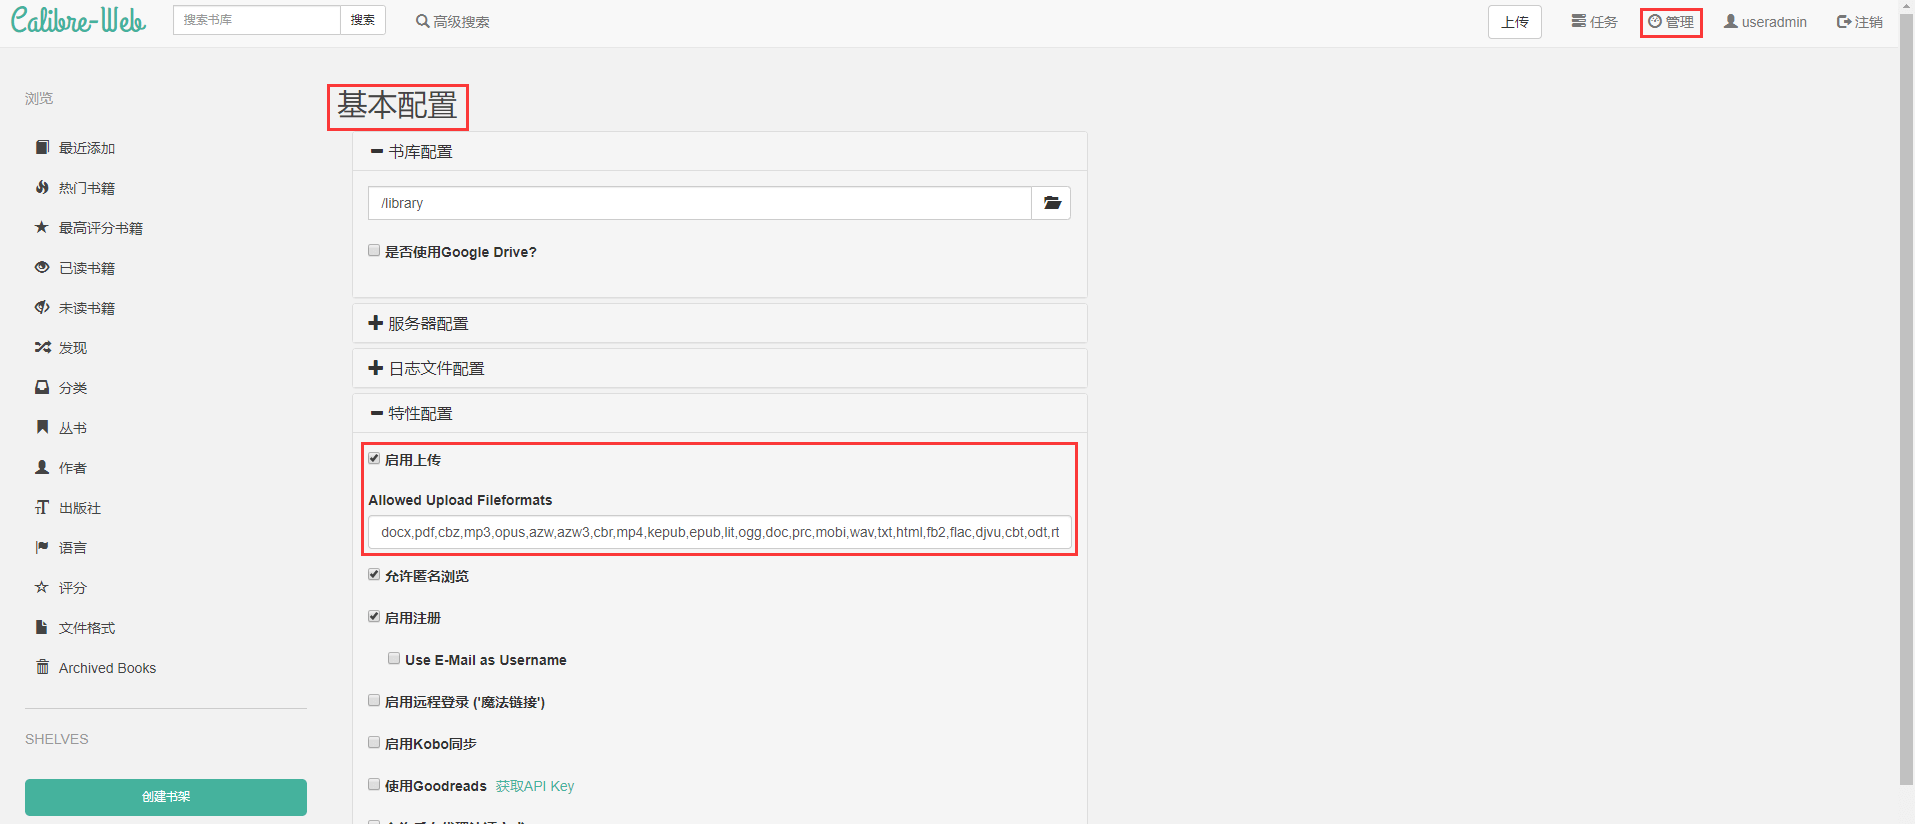
Please note that the book upload function is not enabled by default. You need to click on "Admin" in the top right corner, then go to "Basic Configuration" > "Enable Upload" to enable book uploads.
Enabling HTTPS
Using Synology's Built-In Reverse Proxy (Recommended)
For detailed instructions, you can refer to the article Setting Up HTTPS Access with Synology's Built-In Reverse Proxy.
Directly Adding Certificate Method
Copy a duplicate of the certificate and key files you obtained to the docker/calibre-web/ directory.
Then, within Calibre-web, go to "Admin" > "Basic Configuration" > "Server Configuration" and configure the paths for the SSL certificate and key files (e.g., mine are /config/wiki-power.com.cer and /config/wiki-power.com.key). Afterward, click "Save."
This will enable HTTPS access.
References and Acknowledgments
Original: https://wiki-power.com/ This post is protected by CC BY-NC-SA 4.0 agreement, should be reproduced with attribution.
This post is translated using ChatGPT, please feedback if any omissions.